How to Link Beats Wireless Headphones Easily and Fast
To link Beats wireless headphones, turn them on, put them in pairing mode, and connect through the pop-up prompt on supported iPhones or the Bluetooth menu on Android, Mac, and Windows. If they still will not connect, reset the headphones, forget old pairings, and try again close to the device.
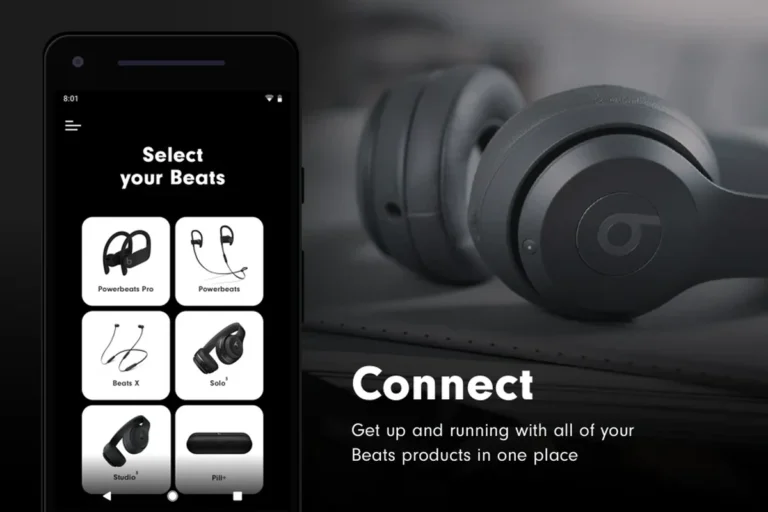
If you want to know how to link Beats wireless headphones quickly, the process is usually simple: turn the headphones on, put them in pairing mode, and connect through Bluetooth or the Beats pop-up prompt on supported devices. The exact steps can vary a little by model and device, so it helps to know the fastest method for iPhone, Android, Mac, and Windows before you start.
- Fastest method: Use the iPhone pop-up prompt when supported.
- Most common fix: Reset the headphones and remove old Bluetooth records.
- Best setup habit: Keep Beats close to one device during pairing.
- Reliability tip: Charge fully and check firmware before troubleshooting.
How to Link Beats Wireless Headphones: What Users Need to Know Before Pairing
Before you try to connect Beats, make sure the headphones are charged and close to the device you want to use. A low battery, old saved connections, or Bluetooth interference can slow the process down more than people expect.
It also helps to know that Beats pairing is not identical across every model. Newer Beats models often connect faster and more smoothly, especially with Apple devices, while older headphones may need the standard Bluetooth menu every time.
Beats headphones can connect to both Apple and non-Apple devices, but the setup experience may feel easier on some platforms than others depending on the model and firmware.
If you are also comparing connection behavior across brands and device types, our guide to wired vs wireless headphones can help you understand why Bluetooth convenience sometimes comes with extra setup steps.
Quick Pairing Steps for iPhone, Android, Mac, and Windows in 2026
The basic idea is the same across devices: power on the Beats, enter pairing mode, and select the headphones from Bluetooth settings if needed. The difference is how fast each device detects them and whether a pop-up prompt appears automatically.
Fast pairing on iPhone with the Beats pop-up prompt
For many newer Beats models, the fastest iPhone setup is the pop-up card that appears when the headphones are near the phone and powered on. If your iPhone is unlocked and Bluetooth is enabled, a pairing window may appear almost immediately.
Press and hold the power button until the indicator light shows the headphones are on and ready to pair.
Keep the headphones within a short distance of the phone so the pairing prompt can appear.
Follow the on-screen instructions and wait for the confirmation message before using audio.
The fastest iPhone method is usually the pop-up prompt, not the manual Bluetooth menu.This is most helpful when you are setting up newer Beats models for the first time.
If you are unsure whether your iPhone model supports the smoothest setup experience, our article on does the iPhone 15 come with headphones and related device guidance may help you plan around accessory expectations.
Connecting Beats to Android using Bluetooth settings
Android pairing is usually straightforward, but it often relies more on the Bluetooth menu than on a pop-up prompt. Open Bluetooth settings, make sure Bluetooth is on, and select the Beats from the available devices list once they appear.
- Bluetooth is enabled on the Android phone
- Beats are in pairing mode
- No other nearby device is already connected
- The headphones are charged enough to complete pairing
Some Android users need to tap “pair” more than once if the headphones were previously connected to another phone or tablet. If the connection fails, turn the headphones off, wait a few seconds, and try again from the Bluetooth menu.
Bluetooth headphones often remember multiple devices, but they usually connect to the most recently used one first unless you manually choose another device.
Linking Beats to Mac and Windows devices
On Mac, the process is similar to other Bluetooth accessories: open System Settings, go to Bluetooth, and choose the Beats when they appear. If the headphones were already paired to your Apple account, reconnection may be even faster.
On Windows, you will usually open Bluetooth & devices settings and select the Beats from the pairing list. If the headphones do not show up right away, keep them in pairing mode and refresh the Bluetooth scan.
For more help with desktop setup, our guide on select headphones in Windows 11 can be useful when Windows sees the device but does not switch audio correctly.
If another audio device keeps taking over the connection, disconnect it first. Bluetooth conflicts are one of the most common reasons Beats seem “stuck” during setup.
Which Beats Models Pair the Fastest and Why Compatibility Matters
Compatibility matters because the easiest pairing experience usually comes from newer Beats models that support modern Bluetooth behavior and Apple-friendly prompts. Older models can still work well, but they may need a more manual setup process.
Beats Studio Pro, Solo 4, Fit Pro, and Powerbeats: model-specific notes
In general, newer models such as Beats Studio Pro, Solo 4, Fit Pro, and Powerbeats tend to be simpler to link because they are designed for faster wireless setup and smoother device switching. That does not mean they never have issues, but the first-time connection is often less frustrating than with older hardware.
Fit and comfort also matter when you are choosing a model for daily use. If you want a broader overview of headphone styles and fit differences, our types of headphones explained guide is a good starting point.
| Model | Best For | Price Range |
|---|---|---|
| Beats Studio Pro | Over-ear listening and travel | Varies by retailer |
| Beats Solo 4 | Portable on-ear use | Varies by retailer |
| Beats Fit Pro | Workout and everyday earbuds | Varies by retailer |
| Powerbeats | Secure fit for active use | Varies by retailer |
Older Beats headphones and earbuds: what changes in the setup process
Older Beats models may not show the same instant pop-up behavior, especially if the firmware is outdated or the device has been paired to many phones over time. In those cases, the Bluetooth menu is usually the safest method.
You may also need to reset older Beats more often if they refuse to appear in the device list. That does not automatically mean they are broken; it often means the saved connection history needs to be cleared.
Step-by-Step Troubleshooting When Beats Won’t Connect
If your Beats will not link properly, do not assume the headphones are defective right away. Most connection issues are caused by pairing confusion, low battery, interference, or a device memory conflict.
Resetting Beats headphones the correct way
A reset is one of the most useful fixes when Beats get stuck in pairing mode or refuse to connect. The exact button combination can vary by model, so it is best to follow the reset method for your specific version rather than guessing.
Turn the Beats off completely before trying a reset.
Hold the right buttons for your model until the indicator light changes or flashes as expected.
After resetting, reconnect through Bluetooth as if it were a new device.
For a broader reset walkthrough across different wireless models, see our how to reset Bluetooth headphones guide.
Fixing Bluetooth interference, battery issues, and device memory conflicts
Bluetooth interference can come from crowded wireless environments, other active headphones, or a device that is trying to reconnect to something else. Moving closer to the phone or laptop often helps more than people expect.
Battery issues can also cause strange behavior. If the headphones are low on charge, they may power on but fail to hold a stable connection long enough to finish pairing.
Listening at high volumes for long periods can cause hearing damage. Keep volume at 60% or below for extended sessions.
If you are hearing dropouts, stutters, or lag after pairing, it may be worth reading our guide to Bluetooth headphone lag fix for more connection-stability ideas.
When to forget the device and start over
If Beats keep connecting to the wrong phone, tablet, or laptop, forget the device in your Bluetooth settings and start fresh. This is often the cleanest way to clear a broken pairing record.
It is especially helpful when you have used the same headphones with many devices over time. Deleting the old record can make the next connection much faster and more reliable.
Common Mistakes That Stop Beats Wireless Headphones from Linking Properly
Many pairing problems come from small setup mistakes rather than major hardware faults. A quick check of distance, saved devices, and battery level can save a lot of time.
Leaving headphones too far from the device
Beats should be close to the phone, tablet, or computer during pairing. If the device is across the room, the Bluetooth signal may be weak enough to delay or interrupt the connection.
This matters even more if there are walls, desks, or other wireless devices nearby. For the most reliable setup, keep the headphones within a few feet of the device while pairing.
Pairing to the wrong saved device
Beats can sometimes reconnect to a previously used device instead of the one you are trying to use now. That can make it look like the headphones are not linking, when they are actually connecting somewhere else.
Turn off Bluetooth on the old device temporarily if needed, then try again on the device you want to use.
Ignoring firmware updates and low battery warnings
Firmware updates can improve connection stability and reduce pairing bugs, so it is worth checking for updates when your Beats are acting unreliable. Low battery warnings matter too, because weak power can create inconsistent Bluetooth behavior.
If your headphones are repeatedly failing to connect, charge them fully before repeating the setup steps. A simple charge cycle can solve more problems than a complicated reset.
Expert Advice: Best Practices for a Stable Beats Bluetooth Connection
Once your Beats are linked, the next goal is keeping them connected without constant re-pairing. A few habits can make daily use much smoother.
How to keep auto-switching and multipoint behavior from causing problems
Some Beats models are designed to move between devices more easily, but that convenience can also create confusion if you use several gadgets every day. If your headphones keep switching away from the device you want, manually disconnect the other device first.
If you experience frequent one-sided audio, repeated dropouts, or hearing discomfort, consult an audiologist or a qualified audio professional. Connection problems and hearing concerns are not always the same issue.
Tips for faster reconnection in daily use
Keep your most-used device’s Bluetooth turned on, but avoid leaving too many unused devices actively competing for the same headphones. If you travel with your Beats, reconnecting is usually faster when the last-used device is nearby and unlocked.
For readers who use headphones on the go, our travel-focused guides on wireless headphones on an airplane can also help explain how Bluetooth behavior changes in transit.
Cost, Value, and When It Makes Sense to Upgrade Your Beats Setup
If your current Beats are still working but hard to link, the right decision is not always to replace them. Sometimes a reset, firmware update, or device cleanup is enough.
Free fixes vs. paid repairs or replacement decisions
Start with free fixes first: charge the headphones, reset them, forget old pairings, and test them on another device. If the problem follows the headphones across multiple devices, then repair or replacement may be worth considering.
Because pricing and repair costs can vary widely, it is smart to compare the value of fixing an older pair against buying a newer model with easier linking and better long-term support.
Comparing new Beats models for easier linking and better reliability
Newer Beats models are often a better choice if you want less setup friction, especially with Apple devices. They may also offer a smoother everyday experience if you regularly switch between a phone, laptop, and tablet.
- Faster pairing on supported devices
- Better convenience for daily use
- Often simpler to reconnect
- Compatibility can still vary by device
- Older devices may need manual setup
- Bluetooth issues can still happen
If you are comparing wireless listening options more broadly, our how noise cancelling headphones work guide can help you decide whether extra features are worth it for your listening habits.
Final Recap: The Fastest Way to Link Beats Wireless Headphones Without Hassle
The fastest way to link Beats wireless headphones is to charge them, place them close to your device, turn on Bluetooth, and use the pop-up prompt on supported iPhones or the Bluetooth menu on Android, Mac, and Windows. If that does not work, reset the headphones, forget old pairings, and try again with only one device nearby.
For most users, the real secret is not a complicated trick—it is clean pairing habits, a full battery, and the right setup path for the device you are using. Once you get that part right, Beats are usually easy to reconnect day after day.
Frequently Asked Questions
Wireless headphones are more convenient for commuting, workouts, and multitasking. Wired headphones can still be better for zero-latency listening and never needing to charge.
Noise cancelling can change how music feels, especially in low frequencies. Good models balance isolation and clarity, but sound preference still depends on the listener.
Open-back headphones often feel more spacious, while closed-back headphones usually isolate better and leak less sound. Closed-back is usually the safer choice for travel, office use, and shared spaces.
Look at latency, microphone quality, comfort, and whether the headphones support wired mode if needed. For studio work, clarity and accurate tuning matter more than boosted bass.
Check weight, clamping force, ear cushion material, and headband padding. A lighter fit with breathable materials usually works better for longer sessions.
Yes, EQ can help fine-tune bass, mids, and treble to better match your taste. Small adjustments usually work better than extreme boosts, which can distort sound.