How To Use Gaming Headphones: Easy Setup Guide

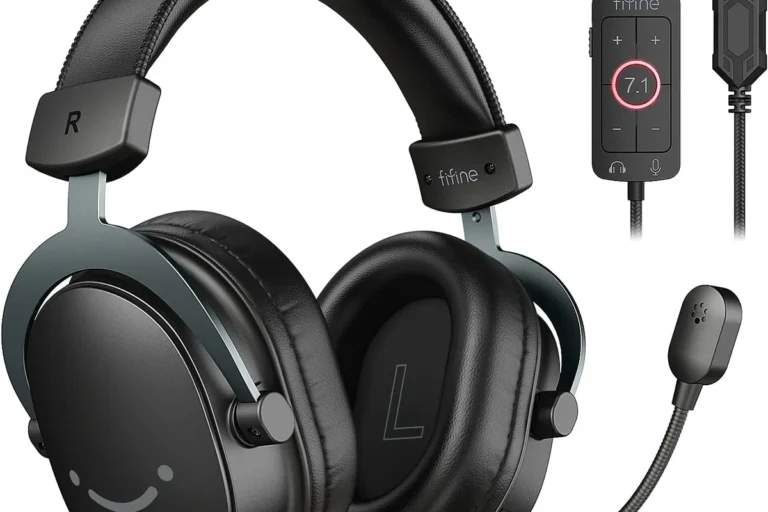
Gaming headphones let you hear game sound, chat with other players, and use a microphone from one headset. On a Windows PC, PlayStation, Xbox, Nintendo Switch, or mobile device in the United States, the basic process is simple: connect the headset, select it as the audio and microphone device, adjust the game mix, and test the sound before playing.
The best setup depends on the connection type. A 3.5 mm headset usually needs no software. A USB headset may need a driver or companion app. A wireless headset may require a USB receiver, Bluetooth pairing, or a console-specific connection method.

What You Need Before Using Gaming Headphones
Check the headset connection, your gaming device, and the included controls before starting. These three details decide which setup steps apply.
Identify the connection type
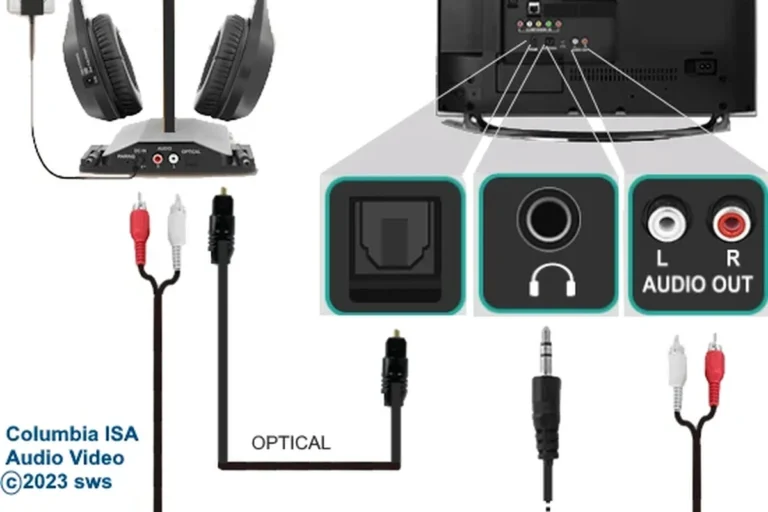
Most gaming headphones use one of these connection methods:
| Connection | Common devices | Main benefit | Main limit |
|---|---|---|---|
| 3.5 mm analog | PCs, controllers, laptops, handhelds | Simple and widely supported | May need a splitter on some PCs |
| USB-A or USB-C | PCs, PlayStation, Xbox models, consoles with USB support | Digital sound and built-in controls | Compatibility varies by device |
| 2.4 GHz wireless | PCs and game consoles | Low delay and wireless chat | Needs a charged headset and USB receiver |
| Bluetooth | Phones, tablets, laptops, some handhelds | Easy wireless connection | May add delay or limit microphone quality |
| Optical audio | Some older consoles and audio systems | Reliable digital audio | Many newer devices no longer include optical ports |
A wired headset gets power through its cable or does not need separate power. A wireless headset uses a battery and may use either a USB receiver or Bluetooth. A 2.4 GHz receiver is often better for gaming because it is designed for low-latency audio.
Check the plugs and adapters
A headset with one four-pole 3.5 mm plug can carry stereo sound and microphone audio through one port. Some desktop computers have separate headphone and microphone ports. In that case, you may need a headset splitter.
USB-C does not guarantee the same features on every device. Some USB-C ports support digital audio, while others may not support the headset at all. Console compatibility also depends on the exact console model and headset version.
Know the main headset controls
Common controls include:
- Volume wheel: Raises or lowers headset volume.
- Mute button: Turns the microphone off.
- Flip-to-mute arm: Mutes the microphone when you raise it.
- Game/chat balance control: Changes the mix between game audio and voice chat.
- Power button: Turns a wireless headset on or off.
- Pair or connect button: Links a wireless headset to its receiver or device.
A volume wheel changes what you hear. It does not always change the volume sent to other players. The mute button usually affects only the microphone.

How to Connect Gaming Headphones to a PC
On a Windows PC, connect the headset first, then choose it as both the output and input device. This prevents Windows from sending game sound to speakers while sending your voice through a laptop microphone.
Wired 3.5 mm setup
- Plug the headset into the headphone port.
- If your PC has separate headphone and microphone ports, use a splitter.
- Select the speaker icon on the Windows taskbar.
- Choose the headset from the output device list.
- Open Settings > System > Sound.
- Under Input, select the headset microphone.
- Speak and watch the input meter move.
- Start a game and test the sound.
If your PC has a combined headset port, one 3.5 mm plug may handle both audio and voice. If the microphone does not work, check whether the plug is fully inserted and whether the port supports headset microphones.
USB headset setup
- Plug the headset or wireless receiver into a USB port.
- Wait for Windows to detect it.
- Open Settings > System > Sound.
- Select the headset under Output.
- Select the headset microphone under Input.
- Open the microphone test option and speak.
- Adjust the input volume if your voice is too quiet or distorted.
Connect the receiver directly to the computer when possible. A USB hub can work, but a faulty or overloaded hub may cause dropouts.
Bluetooth setup
- Turn on Bluetooth in Settings > Bluetooth & devices.
- Put the headset into pairing mode.
- Select the headset from the device list.
- Confirm that Windows shows it as connected.
- Select the headset for output and input in Settings > System > Sound.
- Test both game audio and the microphone.
Bluetooth can show separate playback and headset modes. The hands-free mode may reduce audio quality when the microphone is active. A dedicated 2.4 GHz gaming receiver often avoids this trade-off.
Choose spatial audio carefully
Windows may offer spatial audio options such as Windows Sonic for Headphones. Some headsets also support Dolby Atmos for Headphones or DTS Headphone:X through separate software or a license.
Use only one surround or spatial processing layer at a time. If the game has its own 3D audio mode and the headset software adds another surround mode, the result may sound distant, hollow, or unclear. Test one setting at a time and keep the option that makes footsteps and voices easiest to place.

How to Use Gaming Headphones on PlayStation, Xbox, and Nintendo Switch
Console setup depends on the platform and headset model. A headset that works through a controller may not support wireless chat on another console.
PlayStation 5
For a 3.5 mm headset:
- Plug the headset into the DualSense controller.
- Press the PS button.
- Open the control center and select Sound.
- Set the output device to the headset.
- Choose whether to send all audio or only chat audio to the headset.
- Adjust the microphone level and test your voice.
For a USB or wireless headset, connect the USB receiver to the PS5. Then open Settings > Sound > Audio Output and choose the headset if it is not selected automatically.
The PS5 also includes 3D Audio for Headphones. Enable it only after the headset works normally. Compare the setting with stereo sound in a game you know well.
Xbox Series X|S and Xbox One
For a compatible 3.5 mm headset:
- Plug the headset into the Xbox Wireless Controller.
- Press the Xbox button.
- Open Profile & system > Settings > General > Volume & audio output.
- Adjust headset volume and chat mixer settings.
- Open the microphone options and test voice chat.
USB and wireless compatibility is more restricted on Xbox than on many PCs. Use a headset that specifically lists Xbox support. A USB headset designed only for PC may provide no audio or microphone function when connected to an Xbox console.
Nintendo Switch
A wired 3.5 mm headset can connect to the Switch console or compatible controller. On some Switch models, wireless Bluetooth audio is also available through the console settings.
For Bluetooth:
- Open System Settings.
- Choose Bluetooth Audio.
- Select Add Device.
- Put the headset into pairing mode.
- Choose it from the list.
Bluetooth audio can have limits on microphone use and the number of connected wireless devices. For online games, check whether the specific game and headset support the chat method you plan to use.

How to Set Up and Use the Gaming Microphone
A clear microphone needs the correct input device, good placement, and controlled background noise. A costly headset cannot fix a microphone that is too far from your mouth or aimed at a loud keyboard.
Position the microphone correctly
Place the microphone about 1 to 2 inches from the side of your mouth. Aim the microphone toward your mouth if it has a marked front side. Keep it slightly off-center to reduce breath sounds and popping.
Do not place the microphone directly in front of your lips. Plosive sounds from words such as “power” and “play” can create loud bursts.
Set the input level
Use the system or console microphone test:
- Speak at your normal game-chat volume.
- Watch the input meter.
- Raise the input level if your voice is too quiet.
- Lower it if the meter stays at maximum or your voice sounds harsh.
- Ask a friend whether your voice is clear during a short party chat.
If the game has a microphone sensitivity or open-mic threshold, raise the threshold until keyboard noise stops triggering the microphone. Do not set it so high that the first words of each sentence disappear.
Use push-to-talk when possible
Push-to-talk sends your voice only while you hold a chosen key or button. It works well in shared rooms, near fans, or when several people are speaking nearby.
Voice activation is more convenient but can send breathing, keyboard noise, television sound, or family conversations to other players. Use the lowest sensitivity that still captures your normal voice.
Reduce echo
Echo usually means your microphone is picking up sound from speakers or another headset. Try these fixes:
- Use the headset instead of external speakers.
- Lower the headset volume.
- Move the microphone closer to your mouth.
- Reduce microphone gain.
- Turn on echo cancellation if the game or chat app provides it.
- Ask other players to mute duplicate microphones.

How to Adjust Game Audio and Voice Chat
A good game mix lets you hear important sounds without making voices hard to understand. Start with moderate volume, then adjust one control at a time.
Use the game’s audio menu
Most games offer separate controls for:
- Master volume
- Music
- Sound effects
- Dialogue
- Voice chat
- Dynamic range
- Headphone or speaker output
For competitive games, reducing music can make sound effects easier to hear. For story games, a wider dynamic range may preserve quiet detail and loud effects. If explosions are too loud but dialogue is too quiet, try a compressed or “night mode” mix when the game provides one.
Balance game sound and chat
If your headset has a game/chat dial, move it slowly toward the sound you need. Some consoles also provide a chat mixer in the system menu.
Use this order:
- Set the main headset volume to a comfortable level.
- Set game volume inside the game.
- Set chat volume in the console or app.
- Use the game/chat balance control for small changes.
If chat becomes silent, check whether the balance control is fully set toward game audio.
Test left and right channels
Play a stereo test or a game sound that moves from one side to the other. If left and right are reversed, check the headset cable, adapter, or software setting. A reversed channel can make directional audio misleading.
Virtual surround is not the same as a physical speaker in each direction. It uses processing to create spatial cues. Some people prefer stereo because it sounds clearer. The correct choice depends on the game, headset, and listener.

How to Use Wireless Gaming Headphones
Wireless gaming headphones need three things: a charged battery, the correct connection mode, and a clear link to the receiver or device.
Using a 2.4 GHz wireless receiver
- Charge the headset.
- Plug the USB receiver into the PC or console.
- Turn on the headset.
- Set the headset to 2.4 GHz mode if it has more than one wireless mode.
- Select it as the audio and microphone device.
- Keep the receiver in an open USB port when possible.
Avoid placing the receiver behind a metal computer case or near several crowded wireless devices. If the signal drops, try a different USB port or a short USB extension cable that moves the receiver closer to the headset.
Using Bluetooth
Bluetooth works best for casual play, mobile gaming, and devices without a dedicated gaming receiver. Pair the headset through the device’s Bluetooth menu, then select it for audio.
If sound lags behind the action, use a wired connection or a dedicated low-latency receiver. Bluetooth performance can also change when the microphone is active, so test voice chat before joining a group.
Maintain the battery
Charge the headset before a long session. If the battery is low, wireless audio may cut out or the microphone may stop working before the sound does.
Store the headset in a dry place and avoid excessive heat. Do not use a damaged battery, swollen ear cup, frayed charging cable, or headset that becomes unusually hot. Contact the manufacturer for safe replacement guidance.

How to Fix Common Gaming Headphone Problems
Troubleshoot in this order: connection, selected device, volume, mute state, permissions, and software. This approach solves common problems without changing many settings at once.
| Problem | Likely cause | What to check |
|---|---|---|
| No sound | Wrong output device or loose plug | Select the headset and reconnect it |
| Microphone does not work | Mute, wrong input, or blocked permission | Check mute controls, input selection, and permissions |
| One side is silent | Damaged cable, balance setting, or plug | Test another port and check left/right balance |
| Echo in chat | Speakers or duplicate microphones | Use the headset and lower mic gain |
| Crackling sound | Loose connection, interference, or driver issue | Reconnect, change USB port, and update software |
| Wireless dropouts | Low battery or blocked receiver | Charge the headset and move the receiver |
| Audio delay | Bluetooth latency or processing | Use wired or 2.4 GHz mode |
| Voice is too quiet | Mic too far away or low input level | Move the mic closer and raise input slightly |
If the PC does not detect the headset
Try these steps:
- Unplug and reconnect the headset.
- Try another USB or audio port.
- Restart the game and the computer.
- Confirm that the headset appears in Windows sound settings.
- Check whether another application has exclusive control of the microphone.
- Install firmware or driver updates from the headset maker.
- Test the headset on another compatible device.
Do not install random driver packages from unofficial websites. Use the manufacturer’s support page or the operating system’s built-in update tools.
If the microphone works in Windows but not in the game
Open the game’s audio settings and select the headset microphone directly. Some games do not follow the Windows default device.
Also check privacy permissions in Settings > Privacy & security > Microphone. Make sure microphone access is enabled for the system and the game. If the game uses a separate launcher or voice app, check that app as well.

Safe Volume and Comfortable Headset Use
Keep the volume as low as practical, especially during long gaming sessions. NIOSH identifies 85 dBA over an 8-hour workday as a recommended exposure limit, but headset volume settings do not translate directly into a fixed sound level for every headset and listener.
A safer approach is to:
- Start at a low volume and raise it only as needed.
- Take regular breaks during long sessions.
- Avoid turning up the headset to overcome loud background noise.
- Lower the volume if your ears ring or feel muffled.
- Stop using the headset if it causes pain, dizziness, or skin irritation.
- Seek medical advice for persistent ringing, hearing changes, or ear pain.
Noise-canceling headphones can make quiet listening easier in a loud room. They do not make unlimited volume safe. Active noise cancellation reduces outside sound, but it does not remove the sound produced by the headset.
Clean ear cushions with a manufacturer-approved method. Do not soak the headset, spray liquid into the ear cups, or use harsh cleaners on synthetic leather, fabric, or electronic parts.
Common Mistakes to Avoid
The most common mistake is assuming that every headset works with every gaming device. Compatibility depends on the plug, wireless standard, chat support, operating system, and console model.
Avoid these errors:
- Plugging a USB headset into a port that supports power but not audio.
- Using a PC-only headset on Xbox without confirmed Xbox support.
- Pairing Bluetooth when low-latency game audio is required.
- Leaving the microphone muted in hardware and trying to fix it in software.
- Enabling multiple surround modes at the same time.
- Setting microphone gain so high that your voice clips.
- Running a cable where a chair can roll over it.
- Ignoring firmware updates when the manufacturer documents a fix.
- Increasing volume to compensate for a poor microphone or noisy room.
- Assuming a higher price guarantees better directional audio.
A simple stereo headset can be easier to configure than a feature-rich wireless model. Choose the setup that fits your device and habits, not the longest feature list.

Frequently Asked Questions
Do gaming headphones work with any console?
No. A 3.5 mm headset often works through a compatible controller, but USB and wireless models may require platform-specific support. Check the exact headset model and console before buying or connecting it.
Are gaming headphones better with surround sound?
Not always. Surround processing can help some players locate sounds, but it can also make audio less clear. Test stereo and spatial modes with the same game, then keep the option that gives you the clearest directional cues.
Can I use gaming headphones without a microphone?
Yes. You can mute or remove the microphone on some models. The headset will still play game audio, but you will not be able to speak through it unless you select another microphone.
Why can I hear the game but not my friends?
Check the chat mixer, party-chat output, microphone or chat volume, and the selected output device. On consoles, make sure chat audio is set to the headset rather than the television or monitor.
Why does my wireless headset keep disconnecting?
Low battery, radio interference, distance, a blocked receiver, or outdated firmware can cause dropouts. Charge the headset, move the receiver into an open port, reduce distance, and install official updates.
Final Takeaway
To use gaming headphones, connect them with the correct cable or wireless mode, select them for both sound and voice, adjust the game and chat mix, and test the microphone before playing. When something fails, check the connection and selected devices first.
For the best result, use a 3.5 mm connection for simple compatibility, USB for computer-based digital audio, and a dedicated 2.4 GHz receiver when low-delay wireless gaming matters. Keep the volume moderate, take breaks, and follow the compatibility instructions for your exact PC, console, or mobile device.