How To Wear Bone Conduction Headphones: Easy Comfort Guide

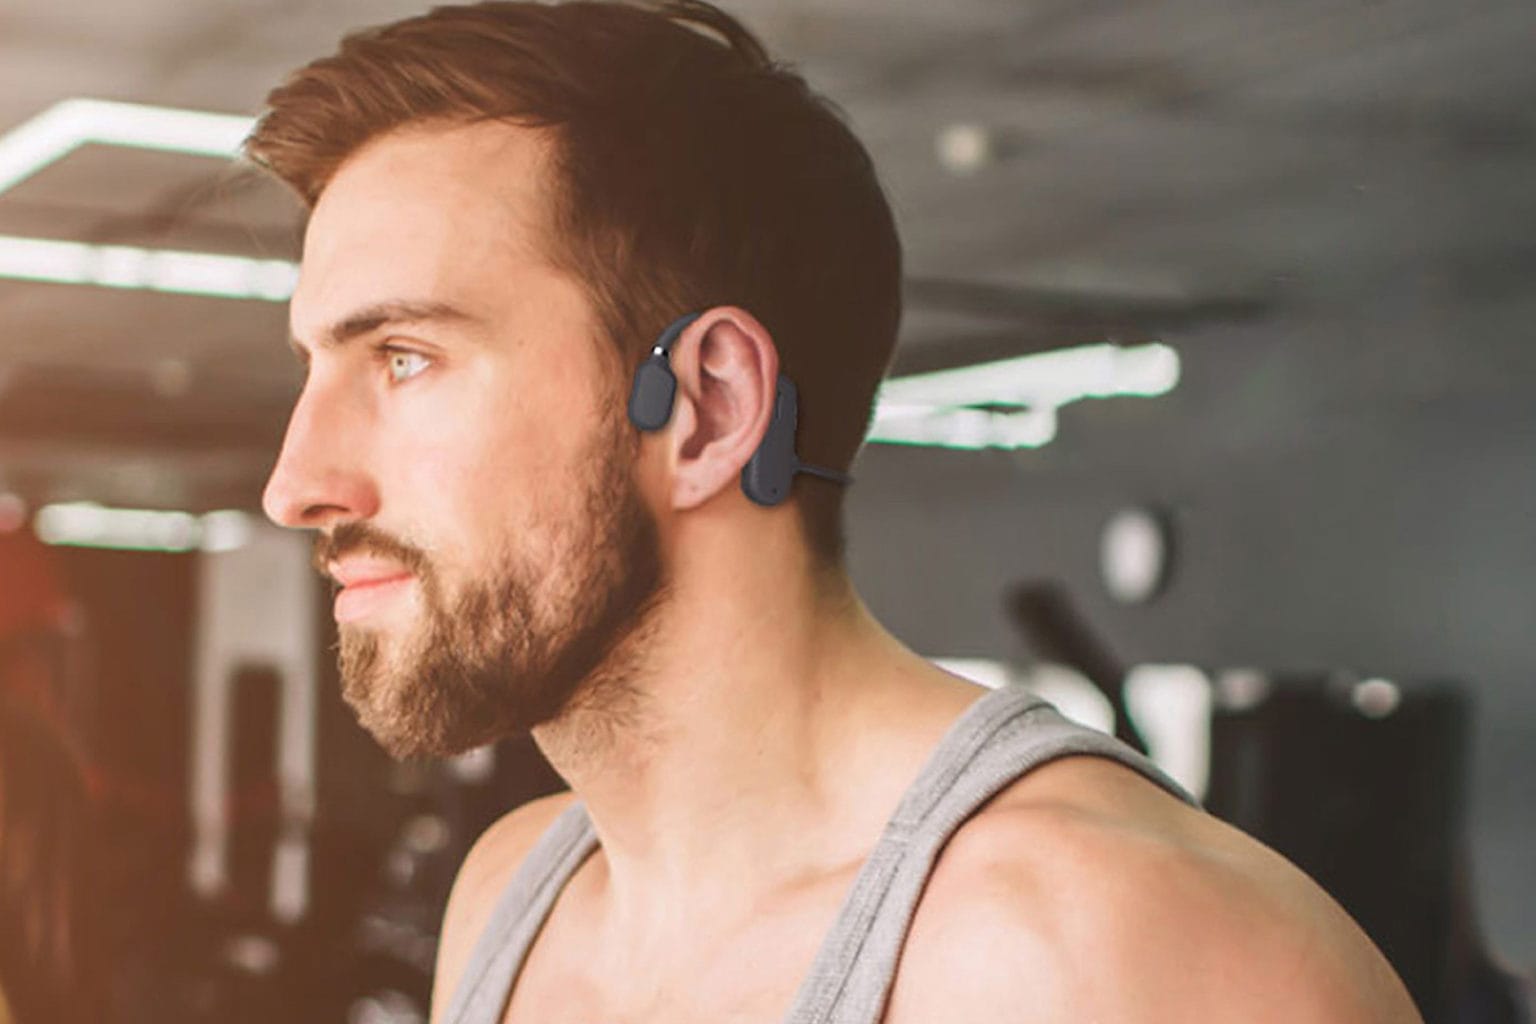
Bone conduction headphones should sit on the bones in front of your ears, not inside your ear canals. Place the transducers—the small speaker pads—flat against your cheekbones, then rest the band behind your head or neck. The fit should feel secure but not tight, and the sound should stay clear at a moderate volume.
This guide applies to people using bone conduction headphones in the United States for work, exercise, travel, and daily listening. It covers fit, sound quality, glasses, helmets, safety, cleaning, and common problems.

What Are Bone Conduction Headphones?
Bone conduction headphones send sound through vibrations in the skull bones near your ears. They do not seal the ear canals like earbuds. Most models sit in front of the ears, while the band curves behind the head.
Traditional headphones send sound through the air. Bone conduction models use small transducers to create gentle vibrations. These vibrations travel through the cheekbone area to the inner ear, where the brain processes them as sound.
Bone conduction headphones are often called open-ear headphones. However, not all open-ear headphones use bone conduction. Some use small air speakers that sit near the ear without blocking the canal.
The main parts include:
- Transducers: The vibrating pads that rest on the cheekbones.
- Behind-the-head band: The frame that holds the transducers in place.
- Ear hooks: Curved parts that may help with stability.
- Control buttons: Buttons for power, volume, calls, and playback.
- Charging port: Often covered by a small rubber seal on water-resistant models.
The transducers should rest on firm bone. If they sit too far forward on the face, the sound may become weak. If they sit on soft tissue or press against the ears, the fit may feel uncomfortable.

How to Wear Bone Conduction Headphones Step by Step
Follow these steps before you start walking, running, working, or riding.
1. Check the left and right sides
Look for the L and R marks. Put the left transducer on the left side of your face and the right transducer on the right side.
The band should curve behind your head. On some models, the band rests high behind the skull. On others, it rests lower near the neck. Follow the product manual if the design uses a specific position.
2. Place the transducers in front of your ears
Set each transducer on the flat bone just in front of the ear. This area is often called the cheekbone or temporal bone area.
Do not place the pads:
- Inside the ear canal
- Directly on the ear
- On the soft cheek
- On the jaw hinge
- Far forward near the eyes
- High on the temple unless the manual says to do so
A good starting point is the area where the arms of eyeglasses often pass. Move the pads slightly until the sound becomes clear.
3. Move the band behind your head
Guide the band behind your head without twisting it. Keep it clear of your ears unless the model is designed to rest around them.
The band should hold the headphones in place without pushing the transducers hard against your skin. A small amount of movement is normal, especially during walking.
4. Adjust the position for clear sound
Play a familiar song or spoken recording. Move both transducers a few millimeters at a time.
You are looking for:
- Clear speech
- Balanced sound on both sides
- Little or no buzzing
- No sharp pressure on the skin
- Stable sound when you move your head
Bone conduction headphones can sound louder or quieter when you change their position. This is normal because the distance and contact with the bone affect vibration.
5. Set the volume after the fit is correct
Do not solve a poor fit by raising the volume. First, reposition the transducers. Then set the volume as low as needed for clear listening.
A moderate volume helps reduce hearing strain. The Centers for Disease Control and Prevention warns that loud sound can damage hearing, especially when exposure lasts a long time. The risk depends on both loudness and listening time.
6. Test the fit with movement
Turn your head left and right. Look up and down. Walk for a few minutes. If you plan to run, jog in place or take a short test walk.
The headphones fit well when:
- The transducers stay on the same bone area
- The band does not bounce
- The sound remains even
- Your skin does not feel sore
- The frame does not interfere with your glasses, hat, or helmet
If the headphones slide, adjust the band or try a different size. Do not bend the frame unless the manufacturer says it is safe.

How Should Bone Conduction Headphones Feel?
Bone conduction headphones should feel light and stable. You may notice gentle pressure from the transducers, but they should not cause pain, numbness, or a strong throbbing sensation.
Some users notice a mild tickle or vibration at first. This often becomes less noticeable after a short adjustment period. Stop using the headphones if you feel pain, dizziness, skin irritation, or unusual hearing symptoms.
The correct fit is not always the tightest fit. Too much pressure can cause:
- Tender skin
- Headaches
- Jaw discomfort
- Pressure near the temples
- Faster fatigue during long listening sessions
If the band feels loose, the headphones may move away from the bone. This can make the sound thin and encourage you to increase the volume. A stable fit is safer and usually sounds better.
Fit by activity
| Activity | Useful fit goal | Main concern |
|---|---|---|
| Walking | Light, stable contact | Wind and traffic noise |
| Running | Firm band with little bounce | Sweat and movement |
| Cycling | Secure fit under or around the helmet | Local traffic laws and awareness |
| Office work | Light pressure for long wear | Calls and nearby speech |
| Travel | Stable fit with clear controls | Engine and crowd noise |
| Swimming | Waterproof model made for swimming | Bluetooth limits underwater |
Open-ear headphones may help you hear nearby sounds, but they do not guarantee that you will hear every car, bike, alarm, or warning. Sound can be masked by traffic, wind, machinery, or crowded spaces.

How to Wear Them With Glasses, Hats, and Helmets
Bone conduction headphones can work with glasses, but the frame, glasses arms, and headphone band may compete for space.
Put on your glasses first. Then place the transducers in front of the ears and guide the headphone band behind the glasses arms. If the band presses against the glasses, try moving it slightly higher or lower.
For hats and caps, put the hat on first. Then position the headphones around it if the design allows. A tight hat can push the transducers out of place.
With a bicycle, motorcycle, or work helmet, check the fit before use. The helmet must sit correctly and remain secure. Do not create a gap or pressure point that changes how the helmet protects your head.
A helmet may also press the band into your skin. If the headphones cause pain or change the helmet position, remove them. Hearing convenience is not a reason to compromise helmet fit.
How to Get Better Sound From Bone Conduction Headphones
Bone conduction headphones usually sound clearest when the transducers sit flat against the correct bone area. Small changes can make a large difference.
Try this adjustment order:
- Confirm the left and right sides.
- Move both transducers slightly backward or forward.
- Make sure the pads touch the skin evenly.
- Check that hair, hat fabric, or glasses are not between the pads and skin.
- Lower the volume, then listen again.
- Check the phone’s Bluetooth and audio settings.
- Test a different song, podcast, or call.
Bass may sound less powerful than it does through sealed earbuds. This is a normal design trade-off. Open designs allow outside sound to enter, so low tones may be harder to hear in loud places.
Wind can also reduce clarity. On a windy walk or bike ride, use a lower speed, change direction, or move to a quieter area. Do not keep raising the volume to overpower heavy traffic or machinery.
During phone calls, the other person may hear wind or background noise. Speak in a calm voice and move away from loud sources when possible.

How to Pair and Use the Controls
Most Bluetooth bone conduction headphones pair in a similar way, but button names and steps differ by model.
A typical setup is:
- Charge the headphones.
- Turn them on.
- Hold the power or Bluetooth button until the status light or voice prompt shows pairing mode.
- Open Bluetooth settings on your phone.
- Select the headphone name.
- Play audio to confirm the connection.
- Adjust the volume on both the phone and headphones if both controls are active.
Keep the phone within the range stated in the manual. Walls, metal objects, and crowded wireless areas can affect the connection.
If pairing fails, turn Bluetooth off and on again. Remove the headphones from the phone’s saved Bluetooth list, restart both devices, and pair them again. Check whether the headphones are already connected to another phone, tablet, or computer.
Use the physical controls before you begin an activity. Learn which button answers a call, pauses audio, changes volume, and turns the device off. This reduces the need to handle your phone while walking or exercising.

Water, Sweat, and Cleaning
Check the exact water-resistance rating before using bone conduction headphones around water. A rating for sweat or rain does not always mean the headphones are safe for swimming.
Some models are designed for pool use and may store music internally. Bluetooth signals generally do not travel well through water, so a phone connection may not work while swimming.
After exercise:
- Wipe the transducers and band with a soft, clean cloth.
- Remove sweat before charging.
- Keep the charging port dry.
- Do not use harsh cleaners, alcohol wipes, or abrasive tools unless the manual permits them.
- Let the headphones dry fully before placing them in a case.
- Inspect seals and covers for damage.
Do not charge wet headphones. Moisture near the charging port can damage the device or create a safety risk.

Safety Limits and Hearing Protection
Bone conduction headphones are not automatically safer than earbuds. They may leave the ear canals open, but loud sound can still reach the inner ear and may contribute to hearing damage.
Use a moderate volume and take breaks during long listening sessions. If people nearby can clearly hear your audio, the volume may be higher than needed.
Do not rely on bone conduction headphones as a substitute for awareness. When crossing a street, driving, operating equipment, or working near hazards, follow local rules and workplace policies. In the United States, headphone and earbud rules can vary by state, city, transit system, road type, and activity.
Be especially careful in these settings:
- Road shoulders
- Construction sites
- Airports and train platforms
- Busy downtown streets
- Near heavy machinery
- During storms or emergency conditions
- While cycling in traffic
Pause the audio when you need to listen for instructions. Keep the volume low enough to notice important sounds when conditions allow, but remember that open ears do not remove all hearing risk.
Contact a hearing professional if you notice ringing, muffled hearing, ear pain, dizziness, or trouble understanding speech after listening. Seek urgent medical care for sudden hearing loss.

Common Problems and Fixes
The sound is too quiet
First, move the transducers closer to the correct bone area. Check the phone and headphone volume separately. Then test another audio file.
If the sound remains quiet, check for a low battery, blocked speaker openings, a Bluetooth connection problem, or a damaged transducer.
The sound is distorted or buzzy
A buzzing sound can come from poor contact, excessive volume, moisture, or an audio connection problem. Lower the volume and reposition the pads.
If the buzzing happens only during calls, the issue may involve the phone, microphone, signal, or call app. Test music and a different call.
The headphones keep sliding
The band may be too loose, or your hair, hat, or glasses may be moving it. Adjust the position behind your head and remove any material between the transducers and skin.
If the frame is too large or too small, use the manufacturer’s approved size or model. Avoid forcing the band into a new shape.
One side sounds louder
Check that both transducers touch the skin evenly. Confirm the phone’s left-right audio balance setting. Then clean both contact areas and test another recording.
If one side stays weak after these checks, the headphones may need service or replacement.
The headphones cause pressure or pain
Move the transducers slightly and reduce the contact pressure. Take a break. If discomfort continues, stop using the headphones.
Pain is not a sign that the fit is secure. A different frame shape may be needed.

Frequently Asked Questions
Do bone conduction headphones go over or behind the ears?
Most models sit in front of the ears, with the band behind the head. They do not go inside the ear canal. The exact band position depends on the model.
Can I wear bone conduction headphones with glasses?
Yes, many people can wear both. Put on the glasses first, then position the transducers and band so neither device pushes the other out of place.
Can I wear bone conduction headphones under a helmet?
You may be able to, but the headphones must not change the helmet’s fit or protection. If the band creates pressure or a gap, do not use both together.
Are bone conduction headphones safe for hearing?
They are not risk-free. Loud sound can affect hearing whether it reaches the inner ear through the air or through bone. Use a moderate volume, take breaks, and stop if you notice pain or ringing.
Why do bone conduction headphones sound better when I press them against my face?
Firm contact can transfer vibrations more effectively. However, pressing them hard is not the correct solution. Reposition the transducers on the cheekbones and keep the fit secure but comfortable.
Key Takeaways
- Place the transducers on the cheekbones in front of your ears.
- Keep the band behind your head or neck, based on the model’s design.
- Adjust the position before raising the volume.
- Test the fit with head movement and the activity you plan to do.
- Check compatibility with glasses, hats, helmets, and safety gear.
- Keep water-resistant claims within the limits listed by the manufacturer.
- Open ears do not guarantee safety or complete awareness.
- Stop using the headphones if they cause pain, dizziness, ringing, or unusual hearing changes.
Conclusion
The best way to wear bone conduction headphones is to place each transducer flat against the bone in front of the ear and keep the band stable behind your head. A correct fit should produce clear sound without strong pressure.
Start with a short, low-volume test. Adjust the position, check nearby gear, and test the headphones while moving. If the sound remains weak or the fit causes pain, stop using them rather than forcing the device to work.