How to Put Headphone Pads Back on JBL Easily and Fast

Align the pad with the earcup notch, tuck the lip into the groove a little at a time, and finish with gentle pressure. If the pad is stretched or damaged, replacement is usually the better fix.
If your JBL ear pads have slipped off, you can usually put them back on without special tools. The key is to match the pad style to the model, line up the seam or lip correctly, and press the cushion into the groove evenly.
- Match first: Confirm the exact JBL model before reinstalling pads.
- Work evenly: Seat the lip around the cup in small sections.
- Inspect wear: Torn or stretched pads may not stay on securely.
- Clean surfaces: Dust and oil can weaken the fit.
- Replace when needed: Worn pads often need a new set, not another reinstall.
How to Put Headphone Pads Back on JBL: What This Guide Covers and Who It’s For

This guide explains how to put headphone pads back on JBL in a way that works for most common over-ear models. It is written for anyone whose cushions came loose after cleaning, normal wear, or a rough pull while traveling.
You do not need to be a repair tech to do this well. But you do need to be patient, because JBL ear pads can use different mounting styles depending on the series and production run.
If you are also comparing headphone comfort, fit, or noise isolation, it may help to read our guide to types of headphones explained and our breakdown of noise cancelling headphones. Those articles can help you understand why a secure pad fit matters for sound and comfort.
Why JBL Ear Pads Come Off: Clip-On, Stretch-Fit, and Adhesive Mount Styles
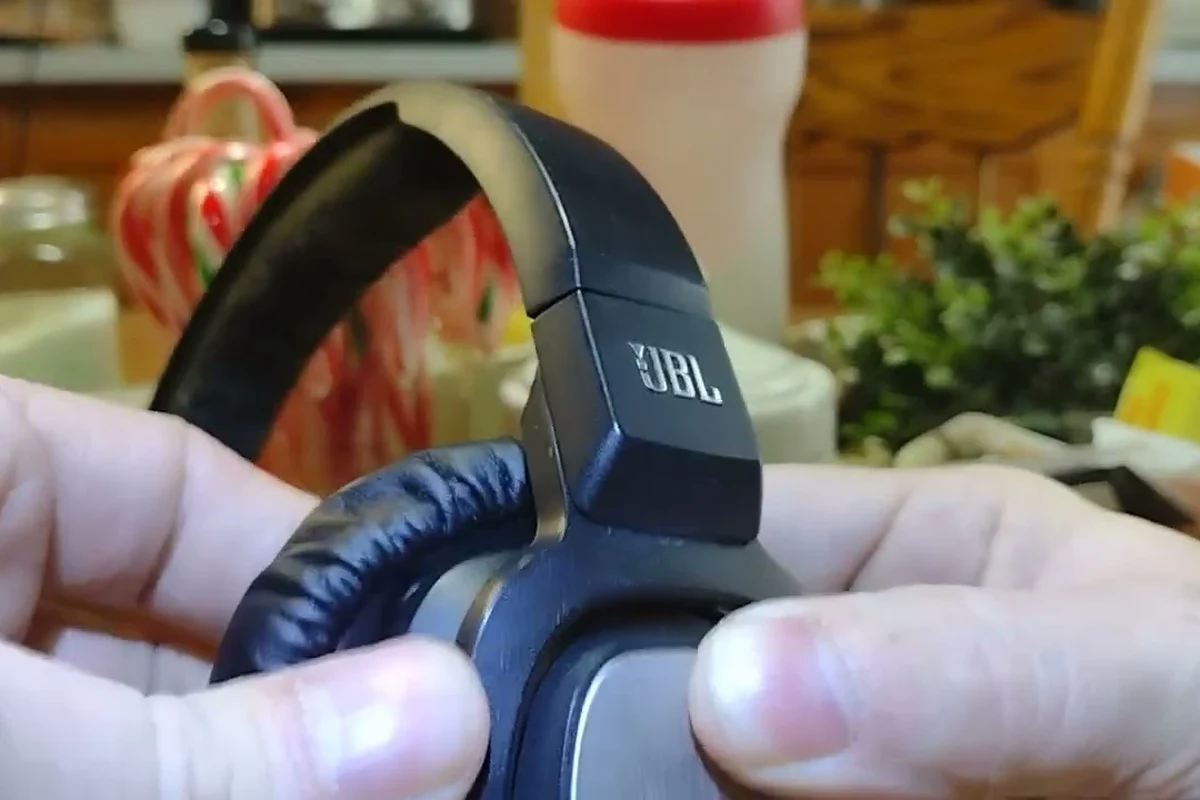
JBL ear pads usually come off for one of three reasons: the pad lip stretched out, the mounting ring did not seat fully, or the adhesive backing lost grip. Some JBL headphones use a clip-like edge that snaps into a groove, while others rely more on a stretch-fit cushion ring.
Adhesive-backed pads are less common on many consumer over-ear models, but they do exist on some replacement pads and older designs. If the original adhesive is weak or dusty, the pad may feel attached at first and then lift again later.
JBL model names can look similar, but the pad mount can still differ by version, year, or region. Always check the exact headphone model before forcing the cushion back into place.
Before You Start: Tools, Pad Condition, and JBL Model Checks
Before you reinstall the pads, take a minute to inspect the headphone and the cushion itself. A clean fit is much easier if the pad lip is still flexible and the earcup groove is free of dust or old adhesive.
Identify your JBL model and ear pad type
Look for the full model name on the headband, inside the cup, or in the product box. JBL Tune, JBL Live, and JBL Club models may look similar from a distance, but their pad attachment methods are not always identical.
If your replacement pads came from a third-party seller, compare them carefully with the original pads. Shape, lip depth, and inner opening size all affect whether the cushion will stay locked in place.
Inspect the pad lip, mounting ring, and earcup groove
Check the thin edge around the pad. If the lip is torn, stretched, or flattened, it may not hold the earcup groove securely anymore.
Also inspect the plastic ring or retaining edge on the headphone cup. If that part is cracked or bent, the pad may pop off no matter how carefully you install it.
- Pad lip is flexible and not torn
- Earcup groove is clean and intact
- Mounting ring is not warped or cracked
- Replacement pad matches the original shape
Clean the surfaces to help the pads seat properly
Use a dry microfiber cloth first to remove dust, skin oil, and loose debris. If needed, lightly dampen the cloth with a small amount of water, but avoid soaking the foam or letting liquid enter the driver area.
Clean surfaces help the pad sit evenly and reduce slipping. This matters even more on headphones used for long listening sessions, gaming, or commuting, where heat and movement can loosen a poor fit over time.
If your pads are slipping because they are oily or worn, cleaning may help temporarily, but it will not fix stretched material. In that case, replacement is usually the better long-term option.
Step-by-Step: How to Put Headphone Pads Back on JBL Correctly
The safest method is to start with alignment, then work around the cup little by little. Do not try to force the entire pad into place at once, especially if the cushion has a tight lip.
Align the pad seam with the earcup notch
Many JBL pads have a seam, thicker edge, or visible join line. Find the notch or opening on the earcup and line that seam up first, because it helps the pad sit in the correct orientation.
Once the first point is aligned, hold that section steady with one hand. This reduces twisting and makes the rest of the installation much easier.
Work the pad lip into the groove evenly around the cup
Use your fingers to tuck the pad lip into the groove a small section at a time. Move around the earcup in a circle, checking that the edge stays seated as you go.
If one part keeps slipping out, stop and back up a little. A pad that is half-seated and half-twisted is more likely to pop off later.
Place the first section into the correct opening before pressing the rest of the pad around the cup.
Work clockwise or counterclockwise, tucking the lip into the groove a little at a time.
Run your fingers around the pad to make sure no part is lifted or folded under.
Use gentle pressure to lock the final section in place
The last few centimeters are usually the tightest. Apply gentle, even pressure with your thumbs until the remaining edge clicks or settles into the groove.
Do not jab the cushion or bend the earcup aggressively. Gentle pressure protects the pad lip and helps avoid damage to the plastic frame underneath.
Listening at high volumes for long periods can cause hearing damage. Keep volume at 60% or below for extended sessions.
Model-Specific Tips for Popular JBL Headphones
JBL makes a wide range of wireless and wired over-ear headphones, so the exact fit can vary. These model-specific notes are general guidance, not a substitute for checking your exact unit.
JBL Tune series: securing snap-fit pads without tearing the lip
JBL Tune models often use a simpler snap-fit or stretch-fit style. That makes them relatively easy to reinstall, but the lip can tear if you pull too hard on one side.
For Tune pads, it usually helps to install the cushion slowly and keep the tension balanced. If the pad feels too tight, warm it slightly with your hands rather than stretching it forcefully.
JBL Live and Club series: handling deeper cushion mounts
JBL Live and Club headphones often use deeper, more cushioned ear pads. These can feel firmer to mount because the foam and outer ring need to settle into the cup at the same time.
Take extra care to keep the inner opening centered. If the opening shifts, the pad may cover part of the driver area and affect comfort or sound balance.
A poorly seated ear pad can change the seal around your ear, which may affect bass response and passive noise isolation even if the headphones still play normally.
JBL wireless over-ear models: avoiding cable and hinge strain
On wireless over-ear JBL models, be careful around the hinge area and any internal wiring near the cup. Pulling the pad from the wrong side can put unnecessary strain on those parts.
Always support the earcup while you work. If the pad is attached near a seam close to the hinge, move slowly so you do not pinch or twist the material.
If your headphones also have Bluetooth issues after a rough pad reinstallation, you may want to review our guide to Bluetooth headphone lag fix for broader wireless troubleshooting.
Common Mistakes That Cause JBL Ear Pads to Pop Off Again
Most repeat failures happen because the pad was installed under tension, not because the headphone is broken. A careful fit usually lasts longer than a rushed one.
Forcing the pad in the wrong direction
Trying to push the pad in from the wrong angle can twist the lip and make it look seated when it is not. This is one of the fastest ways to create a loose corner that keeps lifting.
If the cushion resists, stop and realign it. A correct fit should require pressure, but not brute force.
Installing worn-out pads with stretched edges
If the pad edge is stretched out, it may slide on easily but fail to hold after a few uses. That is common with older headphones that have been stored in heat or used heavily for long sessions.
In that case, reattaching the pad may only be a temporary fix. Worn pads also tend to feel less comfortable and can reduce the headphone seal.
Skipping alignment checks before pressing down
Skipping the seam and notch check can leave the pad slightly rotated. Even a small misalignment can create pressure points that make the cushion loosen later.
Take a few extra seconds to confirm the orientation before you press the final section into place. That small habit often prevents repeat repairs.
When to Replace Instead of Reattach: Cost, Fit, and Comfort Comparison
Sometimes the best answer is not to keep reattaching the same pad. If the material is cracked, flattened, or stretched, replacement may be the smarter and more comfortable choice.
Reattaching original pads vs buying replacement JBL pads
Reattaching original pads makes sense if the cushion is still soft, the lip is intact, and the fit was only disturbed accidentally. It is the quickest and least expensive option when the material is still healthy.
Buying replacement JBL pads is better when the ear pads have lost shape, the foam has compressed, or the outer edge no longer grips properly. New pads can restore comfort and improve the seal, though the exact feel may differ from the original pair.
Aftermarket pad price ranges and fit trade-offs in 2026
Aftermarket pads can be a budget-friendly choice, but fit quality varies a lot by brand and model. Some third-party options feel close to the original, while others may change comfort, clamp feel, or sound slightly.
In 2026, prices still vary widely depending on materials, seller quality, and whether the pads are marketed as replacement, upgrade, or premium comfort cushions. If you are comparing options, look closely at compatibility notes rather than price alone.
Expert Advice for a Secure, Long-Lasting JBL Pad Fit
The best long-term result comes from combining the right pad with careful installation. A snug fit should feel secure without making the earcup uncomfortable.
How to test the seal and comfort after installation
After installing the pads, wear the headphones for a few minutes and gently move your head side to side. The pads should stay seated and feel even around both ears.
Listen for changes in bass, outside noise, or pressure points. If one side feels noticeably different, the pad may not be fully locked in place.
What to avoid if the ear pad keeps slipping off
If the pad keeps slipping, avoid repeated hard pressing, glue experiments, or bending the cup frame. Those quick fixes can create more damage than the original problem.
Instead, check whether the pad is the wrong size, the lip is worn, or the groove has debris. If the issue persists, replacement pads or a professional repair shop may be the better route.
If you notice cracking plastic, exposed wiring, or ongoing discomfort that affects your hearing or jaw, consult a professional audio repair specialist or an audiologist if ear pain is involved.
Final Recap: The Fastest Way to Put JBL Headphone Pads Back On
The fastest reliable method is to align the seam, tuck the pad lip into the groove in small sections, and finish with gentle even pressure. That approach works better than forcing the cushion into place all at once.
If the pad is stretched, damaged, or no longer holding its shape, replacement is usually the better fix. For most JBL owners, a careful reinstall is quick, simple, and enough to get comfortable listening again.
- Match the pad type to your exact JBL model.
- Clean the groove and inspect the pad lip before reinstalling.
- Seat the cushion evenly around the cup, not all at once.
- Replace worn pads if they keep slipping off.
Frequently Asked Questions
Check the model name, pad shape, and lip size against your original cushions. If the pad feels loose before installation, it may not be the correct replacement.
Yes, a poor seal can affect bass, isolation, and overall balance. A proper fit usually gives the most consistent sound.
Over-ear pads are usually easier because they have more surface area and a clearer mounting groove. On-ear designs can be tighter and more sensitive to alignment.
They can, especially if the seal around the ear is weaker than the original pad. Fit and material quality matter more than the brand name alone.
Look for stretched lips, damaged grooves, or the wrong pad size. If the material is worn out, replacement is usually better than repeated reattachment.
Weight, clamp force, pad material, and earcup size matter most for comfort. For sound, look at driver type, tuning, and how well the pads seal around your ears.