How to Connect Turtle Beach Headphones to Xbox Easily
The easiest way to connect Turtle Beach headphones to Xbox is to use the connection type your model was designed for: Xbox Wireless, a 3.5mm controller jack, or a USB transmitter. After pairing, adjust chat mix, mic monitoring, and volume in Xbox settings for the best sound.
If you want to know how to connect Turtle Beach headphones to Xbox, the easiest method depends on your exact headset model. Some Turtle Beach headsets pair directly through Xbox Wireless, while others work best with a 3.5mm controller connection or a USB transmitter/base station.
- Match the model: Xbox compatibility depends on the exact Turtle Beach headset.
- Use the right method: Wireless, wired, and USB transmitter setups are not interchangeable.
- Check settings: Audio balance and chat mix often matter as much as pairing.
- Watch for mistakes: Wrong cables, ports, or platform versions cause many issues.
How to Connect Turtle Beach Headphones to Xbox: What Gamers Need to Know in 2026
Contents
- 1 How to Connect Turtle Beach Headphones to Xbox: What Gamers Need to Know in 2026
- 2 Check Your Turtle Beach Model and Xbox Compatibility Before You Start
- 3 How to Connect Turtle Beach Headphones to Xbox Using the Fastest Method
- 4 Step-by-Step Setup for Better Audio, Chat, and Game Sound Balance
- 5 Common Connection Mistakes That Cause Turtle Beach Headphones to Not Work on Xbox
- 6 Expert Advice: When to Use an Adapter, Dock, or Replacement Cable
- 7 Quick Comparison of Connection Methods: Convenience, Cost, and Sound Quality
- 8 Final Recap: The Easiest Way to Connect Turtle Beach Headphones to Xbox
- 9 Frequently Asked Questions
- 10 Author
Before you start, it helps to know that “Turtle Beach headphones” can mean several different connection styles. That matters because Xbox Series X|S and Xbox One do not treat every headset the same way, and the fastest setup for one model may not work for another.
In most cases, the best path is simple: check your headset type, use the connection method it was designed for, and then fine-tune the Xbox audio settings. If you are also comparing headset behavior across devices, our guide on Turtle Beach headphones on PC can help you understand why the same headset may behave differently on another platform.
Check Your Turtle Beach Model and Xbox Compatibility Before You Start
The most common setup problems happen before the headset is even turned on. Turtle Beach makes wired, wireless, USB, and Xbox-specific models, and not all of them connect to Xbox in the same way.
Look at the product name, the included cable or transmitter, and the symbols on the headset box or manual. If the headset is Xbox-compatible, the setup is usually straightforward; if it is made for another platform, you may need an adapter or a different connection method.
Wired vs. wireless Turtle Beach headphones on Xbox Series X|S and Xbox One
Wired Turtle Beach headsets are usually the simplest option because they often plug directly into the 3.5mm jack on the Xbox controller. Wireless models can be more convenient, but only certain versions support direct Xbox pairing.
Xbox Series X|S and Xbox One both support headset audio through the controller, but wireless support depends on the headset protocol. In other words, a wireless Turtle Beach headset may work perfectly on Xbox, or it may need a USB transmitter or base station instead.
Which Turtle Beach models support direct Xbox pairing and which need adapters
Some Turtle Beach models are designed for Xbox Wireless and can pair directly with the console. Others are made for Bluetooth-only use, PlayStation, PC, or multi-platform gaming, which means they may not connect to Xbox the way you expect.
If your headset does not show up during pairing, do not assume it is broken. It may simply need the correct adapter, the correct USB port, or a controller-based wired connection instead of direct console pairing.
How to Connect Turtle Beach Headphones to Xbox Using the Fastest Method
The fastest connection method is the one your headset already supports. For many gamers, that means either Xbox Wireless pairing, a 3.5mm controller connection, or a USB transmitter that works with the headset’s base station.
The easiest setup is usually the one built into your headset’s intended connection type.Match the headset to the Xbox method instead of forcing the wrong one.
Connecting via Xbox Wireless for supported Turtle Beach headsets
If your Turtle Beach headset supports Xbox Wireless, turn on the headset and put it into pairing mode according to its manual. Then press the Xbox pairing button on the console or follow the Xbox pairing steps through the controller and system menu, depending on the model.
Once paired, the headset should appear as an audio device and begin sending game and chat audio. If pairing fails, make sure the headset is charged, close to the console, and not already connected to another device that may be interfering.
Some Turtle Beach headsets support more than one connection type, but only one may work with Xbox for full game and chat audio. Always check the model’s Xbox instructions first.
Using a 3.5mm controller jack for wired Turtle Beach headphones
For wired Turtle Beach headphones, the 3.5mm jack on the Xbox controller is often the quickest path. Plug the headset into the controller, then make sure the controller is powered on and assigned to the correct Xbox profile.
If you hear game sound but not chat, or the mic is too quiet, the issue is often in the Xbox audio settings rather than the headset itself. A secure cable connection also matters, because a loose plug can cause crackling, one-sided audio, or intermittent mic dropouts.
If your wired headset sounds uneven, remove the plug and reconnect it firmly. A partial connection can make the audio seem broken even when the headset is fine.
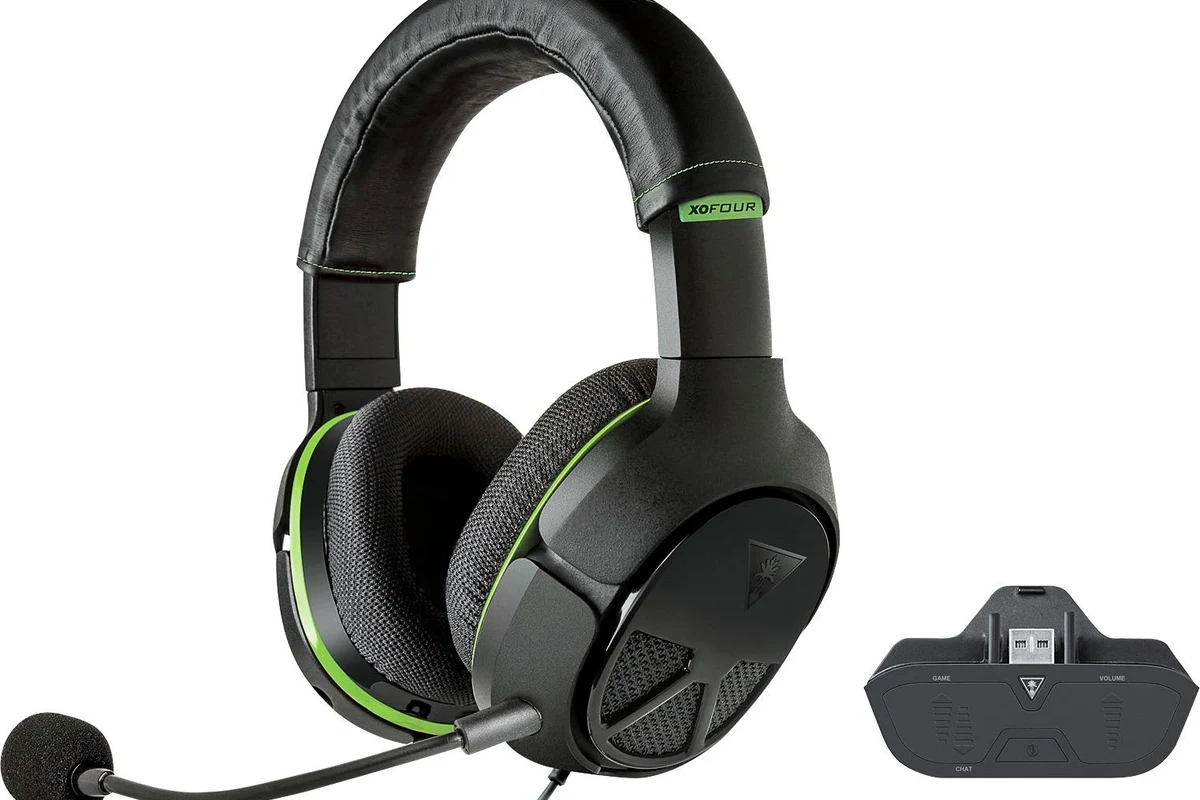
Pairing with USB transmitters or base stations when your model requires it
Some Turtle Beach wireless headsets use a USB transmitter or charging base that handles the Xbox connection. In that case, the transmitter usually needs to be plugged into a compatible USB port on the console, and the headset must be placed into pairing mode.
If your headset came with a dock or transmitter, use that accessory rather than trying to pair the headset directly through Bluetooth. Xbox support for Bluetooth audio is limited, so using the intended wireless accessory is usually the better route.
Step-by-Step Setup for Better Audio, Chat, and Game Sound Balance
Once the headset is connected, the next goal is making the audio comfortable and balanced. Good setup is not just about hearing sound; it is about hearing footsteps, dialogue, and party chat clearly without pushing the volume too high.
Powering on, syncing, and confirming the headset is recognized
Turn on the headset, then confirm the Xbox recognizes it by checking the audio icon, sound output menu, or headset indicator on the controller or console menu. If the headset has a pairing light, wait until it shows a stable connection instead of a flashing one.
If the headset is not recognized, restart the headset, reconnect the cable or transmitter, and try again. A simple reset often fixes temporary sync issues without needing any extra tools.
Adjusting volume, mic monitoring, and chat mixer settings on Xbox
After the headset connects, open Xbox audio settings and adjust game volume, chat volume, and mic monitoring. The right balance depends on the game, your room, and how loud you prefer voice chat to be.
Mic monitoring is especially useful if you want to hear your own voice and avoid shouting. If chat is too quiet, check the chat mixer before turning the headset volume up too far, since that can make the overall sound less comfortable over long sessions.
Listening at high volumes for long periods can cause hearing damage. Keep volume at 60% or below for extended sessions.
Testing audio in a real game session for the best result
The best way to judge your setup is to test it in a live game, not just the Xbox menu. A real match or story mission gives you a better sense of voice clarity, bass balance, and whether footsteps or effects are too overpowering.
If the sound feels muddy, lower the game volume a little and raise chat only if needed. If the mic sounds distant, check the boom position and make sure the microphone is not muted at the headset or in the Xbox menu.
Many headset “connection problems” are really audio balance issues. A headset can be connected correctly and still sound wrong if chat mix, volume, or mic settings are off.
Common Connection Mistakes That Cause Turtle Beach Headphones to Not Work on Xbox
Most Turtle Beach Xbox issues come from small setup mistakes, not major hardware failures. The good news is that many of them are easy to fix once you know where to look.
Using the wrong controller, cable, or USB port
For wired headsets, using the wrong controller or a damaged cable can stop the headset from working properly. For wireless models, plugging the transmitter into an incompatible port or a low-power hub can also cause problems.
If your headset is meant for the controller jack, avoid testing it through random USB accessories first. Start with the connection method the headset was designed for, then move to adapters only if the manual says they are supported.
Forgetting firmware updates or headset reset steps
Some Turtle Beach headsets may need firmware updates or a reset after a connection failure. If the headset was working before and suddenly stopped, a reset can clear temporary pairing problems and restore normal behavior.
Check the manufacturer’s support instructions for your exact model before assuming the headset is faulty. Firmware and reset steps vary by product, so the right fix depends on the headset version you own.
Confusing Xbox-compatible and PlayStation-only Turtle Beach models
This is one of the biggest mistakes buyers make. A headset that looks similar on the outside may be built for a different console family, which can affect wireless pairing, button functions, and chat support.
Important
If a Turtle Beach headset is labeled for another platform, do not assume it will connect to Xbox in the same way. Cross-platform support varies by model, so always check compatibility before buying or troubleshooting.
Expert Advice: When to Use an Adapter, Dock, or Replacement Cable
Accessories can solve a lot of headset issues, but they are not always the right answer. The key is figuring out whether the problem is a missing connection accessory or a headset that simply is not meant for your Xbox setup.
Warning signs that a connection issue is hardware-related, not setup-related
If the headset cuts out when the cable moves, only one ear works, or the mic fails even after reset and reconnection, the issue may be hardware-related. The same is true if the transmitter no longer powers on or the headset will not charge reliably.
At that point, a replacement cable or dock may help if the rest of the headset is still in good condition. If the headset has multiple failing parts, it may be smarter to replace the headset rather than keep buying accessories.
When a low-cost accessory is enough vs. when a better headset is the smarter buy
A low-cost adapter or cable is worth trying when the headset itself is otherwise working well. That is especially true for a good wired headset with a worn cable or a wireless headset that only needs the correct transmitter connection.
If you are constantly fighting compatibility issues, though, a better Xbox-ready headset may save time and frustration. For readers comparing overall audio choices, our broader headphone guides such as how to connect Bluetooth headphones can also help explain why different wireless standards behave so differently.
If you have persistent hearing discomfort, ringing, or trouble understanding speech even after adjusting volume and chat mix, speak with an audiologist. If the headset connection seems unstable across multiple devices, a professional audio specialist or manufacturer support team can help identify whether the issue is the headset or the source device.
Quick Comparison of Connection Methods: Convenience, Cost, and Sound Quality
There is no single best connection method for every player. Wired, wireless, and transmitter-based setups each have trade-offs, and the right choice depends on how you use your Xbox.
Wired connection vs. wireless connection for everyday Xbox gaming
Wired connections are usually the easiest and most affordable option. They are also dependable for long sessions because you do not need to worry about battery life or pairing drops.
Wireless connections offer more freedom and a cleaner setup, which many players prefer for couch gaming. The trade-off is that wireless systems may cost more and sometimes require extra steps to pair or maintain.
| Connection Method | Best For | Main Trade-Off |
|---|---|---|
| 3.5mm wired controller jack | Simple everyday play | Cable movement and controller dependence |
| Xbox Wireless pairing | Clean setup and convenience | Only works on supported models |
| USB transmitter/base station | Wireless gaming with headset support | Extra accessory required |
Best option for party chat, competitive play, and living-room TV use
For party chat, a wired headset is often the easiest way to get started because the setup is direct and simple. For competitive play, many gamers prefer a headset that offers clear positional detail and a stable connection, whether that is wired or wireless.
For living-room TV use, wireless can feel more comfortable because you are not tethered to the controller. If you want to compare overall headset styles, our types of headphones explained guide is a helpful place to learn how different designs affect comfort and sound.
Final Recap: The Easiest Way to Connect Turtle Beach Headphones to Xbox
The easiest way to connect Turtle Beach headphones to Xbox is to match the headset to its intended connection type. If it supports Xbox Wireless, pair it directly; if it is wired, use the controller’s 3.5mm jack; and if it uses a transmitter or base station, connect that accessory exactly as the model instructions say.
Once the headset is connected, spend a minute adjusting game audio, chat mix, and mic monitoring so the sound feels balanced. That small step usually makes a bigger difference than most people expect, and it is the best way to get clear, comfortable Xbox audio from a Turtle Beach headset.
Frequently Asked Questions
Wired headsets are usually simpler and more reliable for quick setup. Wireless is more convenient, but only if your Turtle Beach model supports Xbox properly.
Noise cancelling can help reduce background noise and make chat easier to hear. Results vary by model, fit, and how loud your game audio is set.
Closed-back headsets usually block more outside sound and are better for focused gaming and chat. Open-back designs can feel more spacious, but they leak sound and are less private.
Look at comfort, connection type, and how the headset handles clarity, bass, and microphone quality. Frequency response and driver type can help, but real-world tuning matters more than numbers alone.
Start with the connection type you need most, then compare comfort, mic quality, and durability. A budget headset can still be a good buy if it fits well and works with your console without extra adapters.
Check ear cushion material, headband padding, weight, and whether replacement parts are available. For long sessions, a lighter headset with a secure but gentle fit is usually more comfortable.