How To Open Sennheiser Headphones: Safe Repair Guide

If you need to open Sennheiser headphones in the United States, first decide what you mean by “open.” You may want to remove the ear pads, replace a cable, inspect a loose part, or reach the battery and circuit board. The safe method depends on the exact Sennheiser model. Most wired models open from the ear-pad side, while many wireless models also use hidden screws and delicate clips.
For simple maintenance, start with the ear pads. Do not pry open the main housing unless you need internal access and accept the risk of damage or warranty loss.

Before You Open Sennheiser Headphones
Check the model number before using a tool. Sennheiser has made many headphone designs, and parts that look alike may use different clips, screws, or cable fittings.
You can usually find the model name:
- On the headband
- Inside or below an ear cup
- On the original box
- On the product label
- In the Sennheiser Smart Control app for supported wireless models
- On the purchase record or product registration page
Common model families include:
- HD 200, HD 400, HD 500, and HD 600 series
- HD 25
- Momentum and Momentum Wireless
- PXC Wireless
- Accentum
- GSP gaming headsets
- CX and IE in-ear models
The same series can contain different versions. For example, a wired Momentum model may open in a different way from a Momentum Wireless model.
Tools to Prepare
Use the smallest tool that can do the job. You may need:
- A clean, soft cloth
- A plastic pry tool or guitar pick
- A small Phillips screwdriver
- A small flat screwdriver
- A Torx driver, if the model uses Torx screws
- A small container for screws
- A phone camera for recording cable positions
- Replacement ear pads or a replacement cable, if needed
Avoid using a knife. A knife can cut the ear-pad ring, slip into the driver, or damage your hand.
Safety Checks
Before opening the headphones:
- Unplug the headphone cable.
- Turn off wireless headphones.
- Remove the headphones from Bluetooth charging.
- Let recently charged headphones cool down.
- Work on a clean, dry table.
- Keep magnets, liquids, and metal debris away from the driver.
- Do not pull on thin wires.
- Stop if the housing begins to crack or bend.
Wireless headphones contain a rechargeable lithium-ion battery. Do not puncture, bend, crush, heat, or short the battery. If the battery is swollen, hot, leaking, or damaged, stop the repair and contact Sennheiser or a qualified repair service.
How to Remove Sennheiser Ear Pads
Removing the ear pads is the safest way to “open” many Sennheiser headphones. It gives you access to the pad mount and, on some models, the screws under the pad.
Method 1: Pads With a Slot or Lip
Many over-ear Sennheiser headphones use a pad with a fabric or synthetic lip. The lip fits around a plastic mounting ring.
- Hold the ear cup in one hand.
- Find the point where the pad meets the cup.
- Look for a small gap or loose section of the pad lip.
- Use your fingers or a plastic pry tool to lift the lip.
- Work around the cup a little at a time.
- Pull the pad away only after the lip is free.
Do not yank the pad straight up. Pulling hard can tear the pad or break its mounting ring.
Method 2: Pads With a Snap-Fit Ring
Some Sennheiser pads attach to a plastic ring that snaps into the ear cup.
- Press the pad gently toward the center of the cup.
- Find the edge of the mounting ring.
- Insert a plastic pick between the ring and the cup.
- Release one section of the ring.
- Move around the cup until the ring separates.
- Lift the pad and ring away as one piece.
Use light force. A snap-fit ring should release in stages. If it does not move, check for a hidden screw or a different pad design.
Method 3: Pads That Twist Off
Some headphones use a bayonet-style mount. The pad may unlock with a short turn.
- Hold the ear cup firmly.
- Turn the pad counterclockwise with gentle pressure.
- Stop if it does not move after a small turn.
- Check the model manual before applying more force.
- Lift the pad away once the mount releases.
The correct direction can vary. Do not assume every Sennheiser pad twists off.
What You Should See
After pad removal, you may see:
- A driver cover
- A foam disk
- Small screws
- A cable entry point
- A plastic mounting ring
- The edge of the ear-cup shell
Do not touch the diaphragm or center of the driver. A driver diaphragm is thin and can be damaged by a finger, tool, or dust.
How to Open the Main Ear Cup
Open the main housing only after checking the model-specific manual. The shell may contain small wires, buttons, microphones, a battery, or a circuit board.
General Opening Steps
- Remove the ear pad.
- Inspect the exposed area for screws.
- Use the correct screwdriver bit.
- Press down lightly while turning each screw.
- Place the screws in a labeled container.
- Look for clips around the shell.
- Insert a plastic pry tool into the seam.
- Release one clip at a time.
- Lift the cover slowly.
- Stop when you feel resistance from a wire.
Take a photo before disconnecting anything. This gives you a record of the wire path and connector direction.
How to Separate a Clipped Housing
If no screws are visible, the shell may use internal clips.
Start at a corner or seam that does not contain a button, hinge, or cable port. Slide a plastic pick into the seam. Twist the pick slightly to release one clip. Then move it along the seam.
Do not force the two halves apart. Some clips are part of the housing and can break. A broken clip may cause rattling or a loose ear cup after reassembly.
How to Disconnect Internal Wires
If the housing contains a small plug:
- Grip the connector, not the wire.
- Pull the plug straight out when possible.
- Use tweezers only on the plastic connector.
- Do not twist a fragile wire.
- Note the original wire route before removal.
Some wires are soldered directly to the circuit board. Do not pull them. Replacing a soldered wire requires suitable tools and repair skills.
Model-Specific Notes
The steps below describe common design patterns. They are not a substitute for the manual for your exact model.
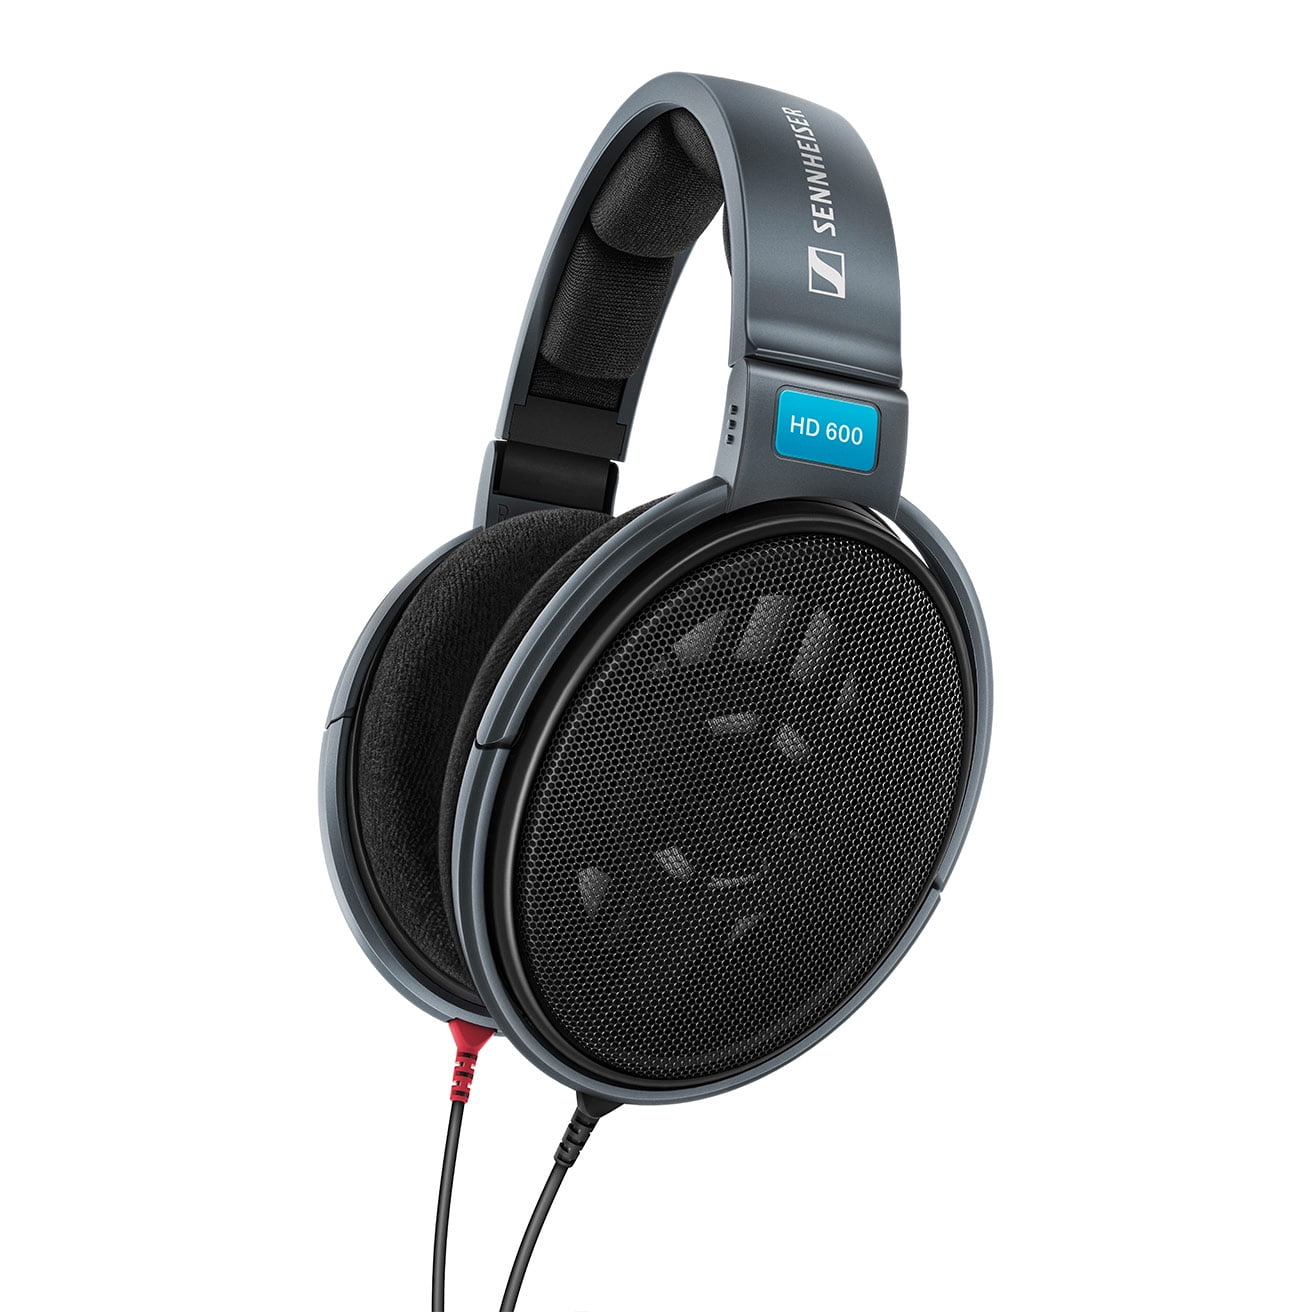
Sennheiser HD 600 Series
Many HD 600-family headphones are built for serviceable parts such as pads, headband padding, and detachable cables. The ear pads usually pull away from their mounting area, and the cable connectors can be removed from the ear cups.
For HD 600, HD 650, HD 660, and related models:
- Remove the ear pads carefully.
- Inspect the driver grille and mounting area.
- Disconnect the cable by pulling the connector from the cup.
- Do not pull on the cable itself.
- Avoid touching the driver membrane.
- Replace the pad or cable in the same orientation.
The driver grille and pad mount may look simple, but the driver behind them is delicate. Do not insert a screwdriver through the grille.
Sennheiser HD 25
The HD 25 uses a modular design with removable pads and a detachable cable. Pad and cable replacement usually does not require opening the electronic driver housing.
To service an HD 25:
- Pull the ear pad away from the ear cup.
- Stretch the replacement pad lip around the cup.
- Remove the cable connector from the cup.
- Route the replacement cable along the same path.
- Press the connector fully into place.
If the goal is only to replace pads or a cable, do not split the ear-cup shell.
Sennheiser HD 200 and HD 400 Families
Some HD 200 and HD 400 models use pads that can be removed from the outer cup. The exact mount may be a lip, ring, or clip.
Start by checking the seam under the pad. If no screw is visible, use a plastic tool and release the pad mount slowly. Do not assume that a similar-looking model uses the same mechanism.
Sennheiser Momentum Wireless Headphones
Momentum Wireless models often contain batteries, microphones, buttons, and circuit boards inside the ear cups. Their shells may use both screws and clips.
Before opening a Momentum Wireless model:
- Confirm the exact generation.
- Find the correct service guide or manual.
- Turn the headset off.
- Do not work on it while charging.
- Avoid bending the hinges.
- Do not puncture the battery.
- Treat ribbon cables and button wires as fragile.
A battery replacement is more complex than pad replacement. If the battery is swollen or the headset has liquid damage, use professional service.
Sennheiser Accentum and Other New Wireless Models
Newer wireless models may use compact shells with hidden fasteners and molded clips. A pad removal tool may be needed to expose the screws.
Do not insert a tool deep into the ear cup. The microphone, battery, and driver may sit close to the inner wall. If you cannot identify the fasteners, stop and locate the model-specific repair information.
Sennheiser In-Ear Headphones
In-ear models are often sealed or glued. Opening them can destroy the shell and may expose very fine wires.
For most in-ear repairs, replacement is more practical than opening the housing. If the cable is detachable, replace the cable without opening the earpiece. If the cable is fixed and the earpiece has failed, professional repair may be the better option.

How to Replace Sennheiser Ear Pads
New pads should match the original size, mounting method, and shape. A poor fit can change comfort, isolation, and sound.
Replacement Steps
- Compare the new pad with the old pad.
- Check the mounting lip or ring.
- Align the pad seam with the original position.
- Hook one section onto the cup.
- Work around the edge with your fingers.
- Press the pad into place.
- Check the full rim for gaps.
- Repeat on the other side.
The pad should sit evenly around the cup. If one section remains loose, the pad may be inside out or the mounting ring may not be seated.
Signs of a Correct Fit
A correctly fitted pad:
- Does not spin freely
- Has no open gaps
- Feels even around the cup
- Does not block the driver
- Does not pull away when lightly tested
- Matches the height and angle of the other pad
Do not use glue unless the model’s repair instructions call for it. Glue can make future pad replacement harder and may damage the plastic or fabric.
How to Replace a Sennheiser Headphone Cable
Many wired Sennheiser headphones use detachable cables. A cable swap usually does not require opening the ear cups.
- Turn off and unplug the headphones.
- Identify the connector type.
- Grip the connector body.
- Pull it straight out.
- Match the left and right connectors.
- Insert the new cable fully.
- Test both channels at low volume.
Some connectors are color-coded or marked with left and right symbols. A cable that is only partly inserted may cause one channel to cut out.
If the cable is permanently attached, do not pry open the cup only to replace it unless you can solder and safely reassemble the housing.
What to Do If the Housing Will Not Open
A housing that will not open may have a hidden screw, a strong clip, adhesive, or a part that must be removed first.
Use this troubleshooting order:
| Symptom | Likely cause | Safe next step |
|---|---|---|
| Pad will not lift | Hidden lip or snap ring | Inspect the pad edge with a light |
| Shell will not separate | Hidden screw | Check under pads, labels, and trim |
| One corner opens only | Internal clip | Move around the seam instead of pulling |
| Cover opens but stops | Connected wire or ribbon | Lift slowly and inspect inside |
| Screw spins but stays in place | Captive screw or damaged thread | Do not force it |
| Plastic begins to whiten | Excess bending force | Stop and change method |
| Battery is visible | Wireless assembly | Avoid puncture and heat |
| Cable will not come out | Locking connector or solder joint | Check the manual; do not pull the wire |
If you hear a crack, smell burnt plastic, see a swollen battery, or find liquid inside, stop the repair.
Common Mistakes to Avoid
Using a Metal Knife
A knife can damage the shell and cause an injury. Use a plastic opening pick.
Pulling the Cable
The cable may be soldered to the driver or attached to a small connector. Pull the connector body instead.
Mixing Screw Locations
Screws may have different lengths. Put each screw beside a drawing or label. A long screw in the wrong hole can damage internal parts.
Touching the Driver
The driver is the part that creates sound. Pressure on its diaphragm can cause distortion, buzzing, or permanent failure.
Opening a Wireless Headphone While Charging
Disconnect the charger first. This reduces electrical risk and prevents strain on the charging port.
Assuming Both Ear Cups Are the Same
In wireless headphones, one cup may hold the battery while the other holds the main board, buttons, or charging parts. Open slowly and do not copy the force used on the first side.
Ignoring Warranty Terms
Opening the housing may affect warranty service, especially if the shell shows pry marks or broken seals. Check the warranty terms that apply to your purchase in the United States before starting.

When to Use Professional Repair
Professional service makes sense when:
- The battery is swollen or damaged.
- The headphone has liquid damage.
- A wire is soldered to a circuit board.
- The shell is glued shut.
- The hinge is cracked.
- The headphones are expensive or difficult to replace.
- You do not have the correct driver bit.
- The repair needs firmware, calibration, or board-level work.
Use Sennheiser’s official support and repair channels for the United States when possible. Have the exact model name, serial number, purchase date, and a clear description of the fault ready.
A repair shop can also help when the problem is not mechanical. One-sided sound may result from a cable, source device, balance setting, broken solder joint, or failed driver. Opening the headphones before checking those causes can create a new problem.
Quick Decision Guide
Use this guide before you start:
| Your goal | Should you open the main housing? | Best first step |
|---|---|---|
| Replace ear pads | No | Remove the pads only |
| Replace a detachable cable | No | Unplug the cable at the cup |
| Clean dust from the pad area | No | Remove pads and use a soft brush |
| Inspect a rattle | Maybe | Remove pads and check for loose parts |
| Replace a fixed cable | Usually yes | Check repair instructions first |
| Replace a battery | Yes, on some models | Use official or qualified service |
| Repair a broken hinge | Usually yes | Consider professional repair |
| Fix liquid damage | Do not start casually | Disconnect power and seek service |
| Reach the circuit board | Yes | Follow the exact model guide |
Frequently Asked Questions
Can I open Sennheiser headphones without special tools?
You can often remove ear pads with your fingers and a plastic pick. Internal repairs may require Phillips or Torx drivers. Do not substitute a tool that does not fit the screw head.
How do I open Sennheiser headphones to clean them?
Remove the ear pads if the model allows it. Use a dry, soft brush or lint-free cloth. Do not spray cleaner into the cup, soak the pads, or touch the driver.
Why is one side of my Sennheiser headset not working?
Check the cable, plug, device balance, Bluetooth connection, and another audio source first. If the fault remains, the issue may be a connector, solder joint, driver, or circuit board.
Can I replace a Sennheiser battery myself?
Some batteries can be replaced, but the process varies by model. Wireless headphones may contain glued batteries, delicate ribbon cables, or compact circuit boards. A swollen battery should not be handled as a normal DIY repair.
Will opening Sennheiser headphones void the warranty?
It may affect warranty service, especially if the repair causes damage or removes a seal. Check the warranty terms for your model and purchase region before opening the housing.
Where can I find the correct opening instructions?
Start with the model-specific user manual and Sennheiser’s United States support pages. Search by the full model name, not only by a family name such as “Momentum” or “HD 500.”
Final Recommendation
For most Sennheiser headphones, begin with the least invasive task: remove the ear pads, inspect the mount, and test the cable or source device. Only open the main ear cup when the exact model requires internal access. Use plastic tools, keep track of screws, protect the driver, and treat every wireless battery as a safety-critical part.
If the model has hidden clips, glued parts, a damaged battery, or soldered wiring, professional service is safer than forcing the shell apart.
Further Reading
- Sennheiser United States Support
- Sennheiser Consumer Manuals and Downloads
- Sennheiser United States Warranty Information