How To Make Soundproof Headphones: Easy DIY Guide

Introduction
For people in the United States, the most practical way to make “soundproof headphones” is to combine closed-back headphones with well-sealed hearing-protection earmuffs. This setup can reduce outside noise, but no home-made headphone can block all sound. Low rumbles, voices, and vibration may still get through.
The goal is usually noise isolation, not total soundproofing. Noise isolation blocks sound with physical barriers. Active noise cancellation, or ANC, uses microphones and speakers to reduce steady low sounds. A good DIY setup can use both methods, but it must stay comfortable and safe for your ears.

What “Soundproof Headphones” Really Means
“Soundproof headphones” is a common search term, but it can describe three different designs:
| Design | How it works | Best for | Main limit |
|---|---|---|---|
| Closed-back headphones | Solid ear cups block some outside sound | Home, office, travel | The ear seal may be weak |
| Passive hearing protection | Thick cups and seals reduce sound | Loud tools, shops, travel | Music may sound dull |
| Active noise-canceling headphones | Speakers create an opposing signal | Airplanes, buses, HVAC noise | Less useful for speech and sharp sounds |
The strongest DIY option is a hybrid design. Place headphones inside or against a pair of over-ear hearing protectors. The headphones provide audio. The earmuffs provide a tighter seal and more mass around the ears.
This design does not create a silent space. Sound can still reach the inner ear through gaps, the head, or the body. That is why “soundproof” should be understood as stronger sound reduction, not complete silence.
Noise isolation versus ANC
Passive protection works best against a wide range of sounds. It can reduce some high-pitched sounds, such as tool noise and clattering dishes.
ANC works best against steady, low-frequency sound. Common examples include:
- Airplane engine hum
- Bus and train noise
- Air conditioners
- Fans
- Road rumble
ANC is less effective against sudden sounds, voices, barking dogs, and sharp impacts. A passive seal is still important.

Materials and Tools You Need
You can make a basic pair of noise-reducing headphones with common parts. Choose parts that fit together without pressing hard on your ears.
Core materials
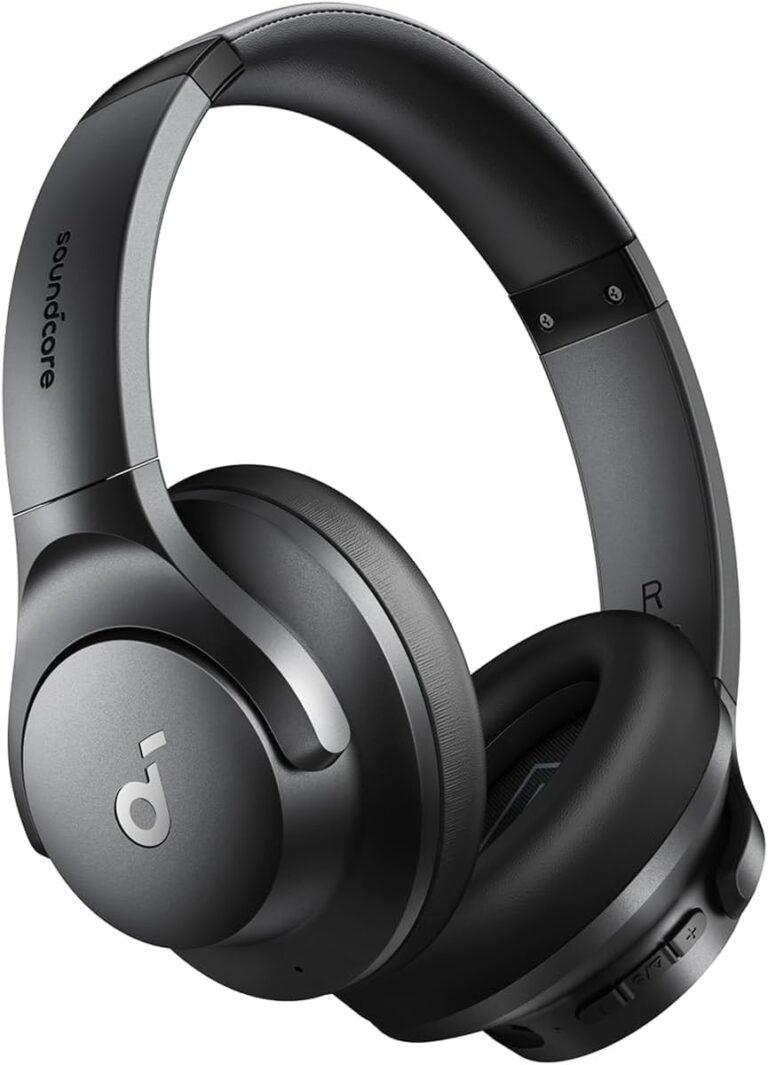
- Over-ear, closed-back headphones
- Over-ear hearing-protection earmuffs
- Thin foam or felt
- Replacement ear pads, if needed
- Soft adhesive-backed weather stripping
- Removable hook-and-loop strips
- Small cable clips or ties
- Scissors
- Ruler
- Mild soap and a clean cloth
Use hearing-protection earmuffs, not thin winter earmuffs. Winter earmuffs are made for warmth. They do not have the same seal or noise-reduction design.
Choose the right headphones
Closed-back headphones work better than open-back headphones. Open-back models have vents in the ear cups. Those vents allow sound to pass in and out.
Look for headphones with:
- Large ear cups
- Soft, replaceable pads
- A low-profile headband
- A detachable cable, if possible
- Controls that do not press against the earmuff
- A comfortable fit for at least 30 minutes
Do not use headphones that become hot, painful, or tight when covered by earmuffs. Pressure around the ears can cause discomfort and may break the seal.
Choose the right earmuffs
Select earmuffs with:
- Cups large enough to fit over the headphone ear cups
- Soft sealing rings
- An adjustable headband
- A visible Noise Reduction Rating, or NRR, label
- No cracks, flattened cushions, or loose parts
The NRR is a laboratory rating for hearing protectors sold in the United States. It is not a promise of the exact reduction you will receive at home. Fit, seal, hair, glasses, and movement all affect performance.

How to Make Soundproof Headphones Step by Step
The safest DIY method is to place a small pair of headphones inside larger hearing-protection earmuffs without blocking the headphone speakers or forcing the cups against your ears.
Step 1: Clean and inspect the parts
Wipe the headphone pads and earmuff cushions with a slightly damp cloth. Let them dry before assembly.
Check for:
- Torn ear pads
- Cracked plastic
- Loose wires
- Sharp edges
- Flattened earmuff seals
- Screws or parts that could touch your ears
Do not use damaged hearing protectors. A small gap can reduce the benefit of the entire setup.
Step 2: Measure the ear cups
Measure the height and width of each headphone ear cup. Then measure the inside space of each earmuff cup.
The earmuff cup should be larger in both directions. The headphone should fit without compressing the cushion. If the earmuff presses the headphone tightly against your head, the setup may become painful and may not seal well.
Step 3: Improve the headphone seal
If the headphone pads are thin or worn, replace them with thicker pads made for the same model. Memory foam pads may improve comfort, but thicker pads can also change the sound.
You can add a thin layer of closed-cell foam beneath the pad. Keep the foam even. Do not cover the speaker opening or push foam into the ear cup.
Avoid loose cotton, tissue, fiberglass, mineral wool, and crumbly packing foam. These materials can shed fibers, trap moisture, or irritate the skin.
Step 4: Place the headphones inside the earmuffs
Put the headphones on first. Center each ear cup over your ear.
Next, place the earmuffs over the headphones. Adjust the earmuff headband until the cushions sit flat against your head.
Check the area around:
- Glasses
- Hair
- The jaw
- The back of the head
- The cable
These areas often create small gaps. Even a narrow gap can let in a large amount of sound.
Step 5: Secure the headphones if needed
If the headphones move inside the earmuffs, use small pieces of removable hook-and-loop tape. Attach the tape to the outer headphone shell and the inner earmuff cup.
Do not glue the headphones permanently to the earmuffs. Permanent glue can damage both parts and make repair difficult.
Keep all fasteners away from:
- The ear
- The speaker grille
- The earmuff cushion
- The headband adjustment points
The headphones should remain removable. This makes cleaning and inspection easier.
Step 6: Seal cable openings
If the headphone cable exits below the earmuff, check whether it creates a gap. A short piece of soft foam weather stripping can help fill a large opening.
Do not pinch the cable sharply. Do not cover a charging port, microphone, or ventilation opening with adhesive.
Wireless headphones avoid the cable gap, but they need charged batteries. Keep a normal wired pair available if you rely on the setup for long trips.
Step 7: Test comfort before using the setup for long periods
Wear the finished headphones for 10 to 15 minutes at a low volume. Look for:
- Ear pain
- Head pressure
- Heat
- Skin irritation
- A weak seal
- Headphone movement
- Muffled or distorted music
If the setup hurts, stop and adjust it. More pressure does not always mean better protection.
How to Test Whether the Headphones Work
A home test can show whether the seal improved, but it cannot provide an official hearing-protection rating.
Start with a quiet room. Play the same audio at the same volume through the headphones. Compare three conditions:
- Headphones alone
- Earmuffs alone
- Headphones combined with earmuffs
Use a steady sound outside the headphones, such as a fan or air purifier. Ask another person to speak from a safe distance, or play a recorded voice at a low level.
Listen for whether the outside sound becomes quieter. Do not use loud music, power tools, fireworks, or gunfire as a test.
A simple phone measurement
A phone sound-level app may show a rough change in room noise. However, phone microphones and apps are not reliable substitutes for a calibrated sound-level meter.
Use the app only for comparison:
- Keep the phone in the same place.
- Use the same sound source.
- Keep the room and distance the same.
- Compare the setup, not the absolute number.
A small number on a phone does not prove that the headphones provide a certain NRR or protect hearing.
Signs of a good result
The setup is working as intended when:
- The earmuff cushions touch the head all the way around.
- The headphone cups stay centered.
- Outside noise sounds lower without extra volume.
- The setup remains comfortable.
- No part of the headphone presses painfully against the ear.
- The seal stays in place when you move your head.
If the result is weak, inspect the seal before adding more foam. Most problems come from gaps, poor fit, or an earmuff that is too small.
How to Improve Noise Reduction Without Making the Headphones Unsafe
Better sound reduction comes mainly from a better seal. It does not come from turning up the music.
Try these changes one at a time:
- Replace flattened earmuff cushions.
- Use thicker headphone pads.
- Tie back hair that crosses the seal.
- Adjust glasses so the arms do not create a large gap.
- Choose larger earmuffs.
- Use closed-back headphones instead of open-back headphones.
- Add ANC for steady low-frequency noise.
- Reduce cable movement near the seal.
- Take regular breaks to reduce heat and pressure.
Do not place hard plastic, metal, or dense objects near the ear. They can cause pressure points and may become dangerous if the headphones shift.
Do not fill the earmuff cavity with loose insulation. The cavity, cushion, and cup are designed as a system. Random filler may reduce comfort without providing a tested improvement.
A practical design choice
| Your main need | Better DIY approach |
|---|---|
| Study or office focus | Closed-back headphones with soft pads |
| Air travel | ANC headphones with a passive seal |
| Shop or yard work | Certified hearing protection; add audio only if safe and permitted |
| Sleeping | Low-profile sleep headphones; avoid hard earmuffs |
| Loud machinery | Certified hearing protection, not a homemade setup |
| Blocking voices | Strong passive seal, realistic expectations, and low music volume |
For hazardous noise, use certified hearing protection by itself or with compatible communication equipment. Do not assume that consumer headphones become certified because you place them inside earmuffs.
Safety Limits You Should Know
A DIY headphone setup is not a substitute for certified hearing protection in a loud workplace, at a shooting range, near aircraft, or around explosive noise.
The U.S. Occupational Safety and Health Administration uses an 8-hour average exposure limit of 90 dBA for many general-industry workplaces, with a 5 dB exchange rate. The National Institute for Occupational Safety and Health uses a more protective recommended exposure limit of 85 dBA over eight hours with a 3 dB exchange rate.
These standards apply to specific workplace and exposure conditions. They do not mean that every sound below a certain number is harmless. Exposure time, distance, impulse noise, and individual health all matter.
Follow these rules:
- Keep headphone volume as low as practical.
- Never use loud music to cover dangerous noise.
- Do not wear noise-blocking headphones where you must hear alarms, vehicles, people, or warnings.
- Stop if you notice ringing, muffled hearing, pain, dizziness, or pressure.
- Give your ears quiet time after loud exposure.
- Check local workplace rules before modifying or combining hearing protection.
- Use a hearing professional if hearing changes continue.
If you need to hear speech while blocking background noise, use a communication headset made for that task. A homemade combination can make speech less clear while also hiding alarms.
Troubleshooting Common Problems
The outside noise is still loud
Possible causes:
- The earmuff is too small.
- The cushion is worn.
- Hair or glasses create a gap.
- The headphone cups prevent a flat seal.
- The sound travels through the head or body.
Fix: Check the seal all the way around both ears. Replace worn cushions before adding more material.
The setup sounds worse than the headphones alone
Possible causes:
- The earmuffs change the sound balance.
- The headphone cups touch the earmuff.
- The speaker opening is partly blocked.
- The headphones are pressed out of position.
Fix: Re-center the headphones. Remove any foam near the speaker opening. If the sound remains poor, use ANC headphones with earmuffs that have more room.
The headphones hurt after a few minutes
Possible causes:
- Too much clamping force
- A small earmuff cup
- Hard parts pressing on the ear
- Excess heat
- A poor headband fit
Fix: Stop wearing them. Try larger earmuffs or thinner headphones. Never use pain as a sign that the setup is working.
The earmuffs keep sliding
Possible causes:
- The headband is loose.
- The headphone cable pulls on the assembly.
- The ear cups are too heavy.
- The earmuff cushion is oily or worn.
Fix: Adjust the headband and route the cable down the back or side. Replace cushions that no longer grip the head.
ANC creates a low hum or pressure feeling
Some people notice a pressure-like sensation when using ANC. ANC does not remove air pressure, but the change in low-frequency sound can feel unusual.
Turn ANC off and compare. If you feel pain, dizziness, or nausea, stop using it and consider a different model or passive protection.
Maintenance and Replacement
Inspect the setup before each use in a loud environment. Look for cracks, loose parts, dirty cushions, and flattened seals.
Clean the cushions according to the manufacturer’s instructions. Sweat, skin oil, and dust can weaken the seal. Do not soak electronic headphones or use strong solvents.
Replace earmuff cushions when they become:
- Hard
- Cracked
- Torn
- Sticky
- Permanently flattened
- Unable to seal
Replace the earmuffs if the cup, headband, or seal is damaged. A DIY repair may restore comfort, but it does not restore a certified rating unless the manufacturer approves the repair.
Store the headphones in a dry place. Keep batteries charged, but do not leave damaged or swollen batteries in use.
Frequently Asked Questions
Can I make completely silent headphones at home?
No. A home-made design can reduce outside sound, but it cannot block every sound. Noise can enter through gaps, the head, and the body. The best practical result comes from a close passive seal plus ANC for steady low sounds.
Is it safe to put regular headphones under ear defenders?
It can be safe for quiet listening if the fit is comfortable and the headphone volume stays low. It is not automatically a certified hearing-protection system. For hazardous noise, use hearing protection approved for that setting and follow workplace or range rules.
Will adding foam make headphones more soundproof?
Only if the foam improves a real gap without causing discomfort or breaking the seal. Soft, closed-cell foam can help with fit. Loose or bulky foam may do little and can block the headphone speaker.
Can I use noise-canceling headphones instead of hearing protection?
Usually not in hazardous noise. ANC headphones are designed to improve listening comfort, not always to protect hearing. Use certified hearing protection when the sound level or work setting requires it.
How loud should the music be?
Use the lowest level that lets you hear the content. If you need to raise the volume to overcome outside noise, improve the seal or move to a quieter place instead. Ringing or muffled hearing after use is a warning sign.
Conclusion
To make stronger noise-reducing headphones, start with closed-back headphones and large over-ear hearing protectors. Keep the ear cups centered, improve the seal with safe materials, and use removable fasteners rather than permanent glue.
The design works best for travel, study, and steady background noise. It is not a replacement for certified hearing protection in dangerous environments. Keep the volume low, protect warning sounds, and stop using the setup if it causes pain or changes your hearing.
For the next step, test the fit in a quiet room, inspect every seal, and compare headphones alone with the combined setup. Choose comfort and safe use over maximum pressure.
Sources and further reading
- OSHA: Occupational Noise Exposure
- OSHA: Occupational Noise Exposure Standard, 29 CFR 1910.95
- CDC/NIOSH: Noise and Hearing Loss Prevention
- CDC/NIOSH: Hearing Loss Prevention